
AXIS A1601 कॅमेरा स्टेशन सुरक्षित प्रवेश वापरकर्ता मार्गदर्शक
परिचय
या दस्तऐवजातील चरणांचे अनुसरण केल्याने तुम्हाला AXIS कॅमेरा स्टेशन सुरक्षित प्रवेशामध्ये प्रवेश नियंत्रण वैशिष्ट्यांसाठी मल्टी सर्व्हर कार्यक्षमता कशी कॉन्फिगर करायची याचे मार्गदर्शन मिळेल.

पूर्वतयारी
अॅक्सिस कॅमेरा स्टेशन ५.४७ किंवा उच्च
AXIS A1601 11.0.40.2 किंवा उच्च
Please note that Axis doesn’t take any responsibility for how this configuration may affect your system. If the modification fails or if you get other unexpected results, you may have to restore the settings to default.
Step 1 – Creating the Main/Sub server
We start by opening AXIS Camera Station on the server we wish to allocate as the Sub server.
This will allow us to create global cardholders from this server
सब सर्व्हर तयार करण्यासाठी
Follow these steps to create the Sub server:
- In Axis Camera Station open the configuration tab via the “+” symbol found at the top of the screen.
- From the left menu select “Access control” and under this drop-down select “Multi server”
- On this page select “Sub server” then select “Generate”

- A pop-up will appear to generate the configuration key file जे ही की सक्रिय असताना या सर्व्हरला मुख्य सर्व्हर होण्यापासून प्रतिबंधित करेल. पुढे जाण्यासाठी "होय" दाबा

- डाउनलोड करा file आणि हे मुख्य सर्व्हरवर ट्रान्सफर करा, या सब सर्व्हरचे नाव आणि आयपी अॅड्रेस लिहून ठेवा.

मुख्य सर्व्हर तयार करण्यासाठी
Follow these steps to create the Main server:
- In Axis Camera Station open the configuration tab via the “+” symbol found at the top of the screen.
- From the left menu select “Access control” and under this drop-down select “Multi server”
- On this page select “Main server” and select the “+ Add” button.

- A pop-up will appear explaining that you are assigning this as the main server, not allowing this server to be able to become a Sub server while any Sub servers are connected. Press “Yes”

- मध्ये file एक्सप्लोररमध्ये कॉन्फिगरेशन की निवडा. file आम्ही सब सर्व्हर तयार केला आणि त्यापासून हलवला. आणि सर्व्हरचे अनुकूल नाव आणि आयपी अॅड्रेस वापरून 2 क्षेत्रे भरा. तुमच्या पसंतीनुसार विशिष्ट पोर्ट वापरला जात नाही तोपर्यंत पोर्ट डीफॉल्ट राहू शकतो. शेवटी "इम्पोर्ट" वर क्लिक करा.

- Now you configured your main server and added the first sub server, you can repeat the Sub server steps and continue to add the Sub servers to the main site if needed. On the Main server page, you will see these servers listed with their current status. This should be green stating “Connected”. If this is yellow stating “Dis-connected” please ensure you provided the correct key and matched the right IP address. These must also be in the same IP network system.

Step 2 – Creating Global cardholders
Now that the Sub servers are linked to the Main server we can create Global cardholders on the main site, these will then show up in the Sub server cardholder list so they can be given the correct access rights at each Sub server location.
जागतिक कार्डधारक तयार करणे
Follow these steps to create a Global cardholder:
- In Axis Camera Station open the Access Management tab via the “+” symbol found at the top of the screen.
- On the left side panel click the “+” symbol followed but the single person symbol to start creating a cardholder.

- Fill in the user’s name, details and add the correct credentials for the cardholder, To then make this cardholder a Global cardholder select the “More” drop down to expand the additional options.

- Now we can tick the “Global cardholder” tickbox and select “Add” at the top of the screen.

Step 3 – Creating Global groups
Now that the global cardholders have been created, we can create Global groups on the main site, these will then show up in the Sub server group list so they can be given the correct access rights at each Sub server location.
जागतिक गट तयार करणे
Follow these steps to create a Global group:
- In Axis Camera Station open the Access Management tab via the “+” symbol found at the top of the screen.
- On the left side panel click the “+” symbol followed but the double person symbol to start creating a group.

- Here you can give the group a name and make it as a global group using the tickbox. From this page you can already add the cardholders you wish to be a member of this group. Other members can still be added or removed at a later stagई. नंतर "जोडा" वर क्लिक करा.

Step 4 – Managing Global cardholders
एकदा आपण मुख्य सर्व्हरवरून ग्लोबल कार्डधारक आणि गट तयार केले की, आपण आता करू शकतो view these on the linked Sub server to apply to the rules.
सब सर्व्हरवर जागतिक कार्डधारकांचे व्यवस्थापन करणे
Follow these steps to manage the Global cardholders on Sub servers:
- From the Sub Server ACS client open the Access Management tab via the “+” symbol found at the top of the screen.
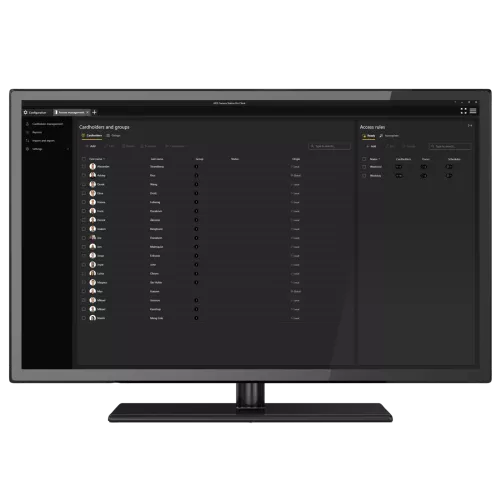
- In the cardholder panel you can now see the Global cardholders and groups that were created via the main site, on the right of the cardholder is an information bubble stating if the user or group is “global” or “Local.

- These Global cardholders can be then added to any of the local Sub server groups and access rules like the current local cardholders.
Step 5 – Adding Monitoring Sub server controllers
आता आमच्याकडे कार्डधारकांना प्रवेशयोग्यता असल्याने, आम्ही हे देखील कॉन्फिगर करू शकतो view the Sub server controllers from the Main server
सर्व्हर जोडत आहे view मुख्य ACS क्लायंटला.
Follow these steps to add the Sub server(s) to the Main server:
- Click the three stacked line or “burger” symbol in the top right of the client application and choose Servers then Server Lists.

- In the pop-up select “Add” then in the next pop-up select remote server. In the fields provide the IP address, then the username and password. Finally Select “OK”

- Go To the “Connection Status” by clicking the 3 lines top right again and selecting “Servers” then “Connection Status”

- In this new pop-up ensure that the remote servers are enabled.

Step 6 – Multi Server monitoring and assistance
AXIS कॅमेरा स्टेशन सिक्युअर एंट्री वापरणाऱ्या ऑपरेटरला एकाच स्प्लिटमधील अनेक साइट्सवर रिअल-टाइममध्ये दरवाजाच्या स्थितीचे निरीक्षण करण्याची शक्यता असते. view.
An operator, using AXIS Camera Station Secure Entry, can grant access and enforce manual override actions on doors from different sites within the split view आणि त्याच वेळी कॅमेरा वापरून कार्डधारकांची ओळख दृश्यमानपणे पडताळून पहा views.
विभाजन तयार करणे view दूरच्या जागेवरून दरवाजाच्या डॅशबोर्डसह
As the support for remote viewAXIS कॅमेरा स्टेशनमधील s कॅमेरा आणि स्प्लिटपुरते मर्यादित आहेत viewदरवाजाचे डॅशबोर्ड एका स्प्लिटमध्ये समाविष्ट करणे आवश्यक आहे view स्थानिक पातळीवर अव्वल viewदूरस्थपणे एड.
- While being locally connected to the sub server that has the doors you want to monitor remotely open a live view टॅबवर, +-बटण दाबा आणि नवीन स्प्लिट तयार करण्यासाठी निवडा view.

- तयार करा viewज्यामध्ये दरवाजाचे डॅशबोर्ड आणि तुम्हाला हवे असलेले कोणतेही कॅमेरे आहेत viewदूरस्थपणे एड करा. याला एक संबंधित नाव द्या आणि सेव्ह करा view. नंतर जतन करा view

- Now from the main server you can see the newly created local/sub server split view थेट मध्ये view यादी

- On the main server, note that you can now create a split view सर्व कनेक्टेड सर्व्हरवरील डोअर डॅशबोर्ड आहेत आणि ते सर्व एका विभाजित ठिकाणी खेचू शकतात view कॉन्फिगरेशन. या मिश्र विभाजनासह view कॉन्फिगरेशनसह, तुम्ही लाईव्ह मॉनिटरिंग करू शकता तसेच कोणत्याही रिमोट क्लायंटवरून दरवाजे नियंत्रित करू शकता.

Step 7 – Multi Server investigation
AXIS कॅमेरा स्टेशन सिक्युअर एंट्री वापरून ऑपरेटर एकाच वेळी सर्व कनेक्ट केलेल्या साइट्सवरून अॅक्सेस कंट्रोल इव्हेंट्स शोधू शकतो आणि वैयक्तिक स्प्लिटशी जोडलेल्या व्हिडिओ रेकॉर्डिंगसह एकत्रितपणे तपासू शकतो. views.
डेटा शोध टॅबमध्ये घटनेची चौकशी करणे
When a client is connected to multiple servers an operator can simply open the Data search tab, in the server column identify the name of the server that is the origin of the event and open the relevant view रेकॉर्डिंग्जच्या खालीूनview स्क्रीनच्या उजव्या बाजूला असलेला विभाग

Step 8 – Multi Server management
An administrator, using AXIS Camera Station Secure Entry, can use Secure Remote Access to manage access control locally at each connected site including management of cardholders and credentials. All access control data is situated on the specific site server and can be shared across sites, either by exporting and importing between sites or adding the relevant cardholders on the sites where they are needed manually.
एकाधिक साइट्सवरील प्रवेश व्यवस्थापित करणे
Connected to multiple server each server’s access control database is maintained locally, meaning that you can switch to the server you want to configure access control on by using the server drop-down.

Step 9 – Multi Server Configuration
अॅक्सिस कॅमेरा स्टेशन सिक्युअर एंट्री वापरणारा प्रशासक, प्रत्येक कनेक्ट केलेल्या साइटवर स्थानिक पातळीवर अॅक्सेस कंट्रोलसह सिस्टम कॉन्फिगरेशन व्यवस्थापित करण्यासाठी सिक्युअर रिमोट अॅक्सेस वापरू शकतो.
विचार आणि मर्यादा
- Multi server configuration requires to be on the same network
- You can have up to 64 servers connected to the main server
- Ensure that the required ports are opened for communication between the main and sub servers (please check the ACS user manual for required ports)
या मॅन्युअलबद्दल अधिक वाचा आणि PDF डाउनलोड करा:
कागदपत्रे / संसाधने
 |
अॅक्सिस ए१६०१ कॅमेरा स्टेशन सुरक्षित प्रवेश [pdf] वापरकर्ता मार्गदर्शक अॅक्सिस कॅमेरा स्टेशन ५.४७, अॅक्सिस ए१६०१ ११.०.४०.२, ए१६०१ कॅमेरा स्टेशन सिक्युअर एंट्री, ए१६०१, कॅमेरा स्टेशन सिक्युअर एंट्री, सिक्युअर एंट्री, एंट्री |