परिचय
The RockJam DDMESH1000 Mesh Head Electronic Drum Kit is an advanced electronic drumming solution designed for aspiring and professional drummers. This kit features velocity-sensitive mesh drum heads, offering an organic and natural playing experience. It includes a comprehensive drum module with a variety of authentic voices and demo songs, along with essential connectivity options for versatile use.
This manual provides detailed instructions for setting up, operating, and maintaining your RockJam electronic drum kit, ensuring optimal performance and longevity.
पॅकेज सामग्री
- इलेक्ट्रॉनिक ड्रम मॉड्यूल
- Mesh Head Snare Drum Pad
- Three Mesh Head Tom Pads
- Three Cymbal Pads (Hi-Hat, Crash, Ride)
- बास ड्रम पेडल
- हाय-हॅट कंट्रोल पेडल
- Drum Rack/Stand
- ड्रमस्टिकक्स
- All necessary cables and power adapter
सेटअप
Follow these steps to assemble and set up your electronic drum kit.
1. Assembling the Drum Rack
Unpack all components. Assemble the main drum rack frame according to the diagrams provided in your quick start guide (not included in this manual). Ensure all clamps and joints are securely tightened to provide a stable foundation for the drum pads and cymbals.
2. Attaching Pads and Cymbals
Attach the mesh drum pads (snare and toms) and cymbal pads (hi-hat, crash, ride) to the drum rack using the provided mounts. Adjust their positions and angles for comfortable playing. The mesh heads are velocity-sensitive, providing a realistic feel.
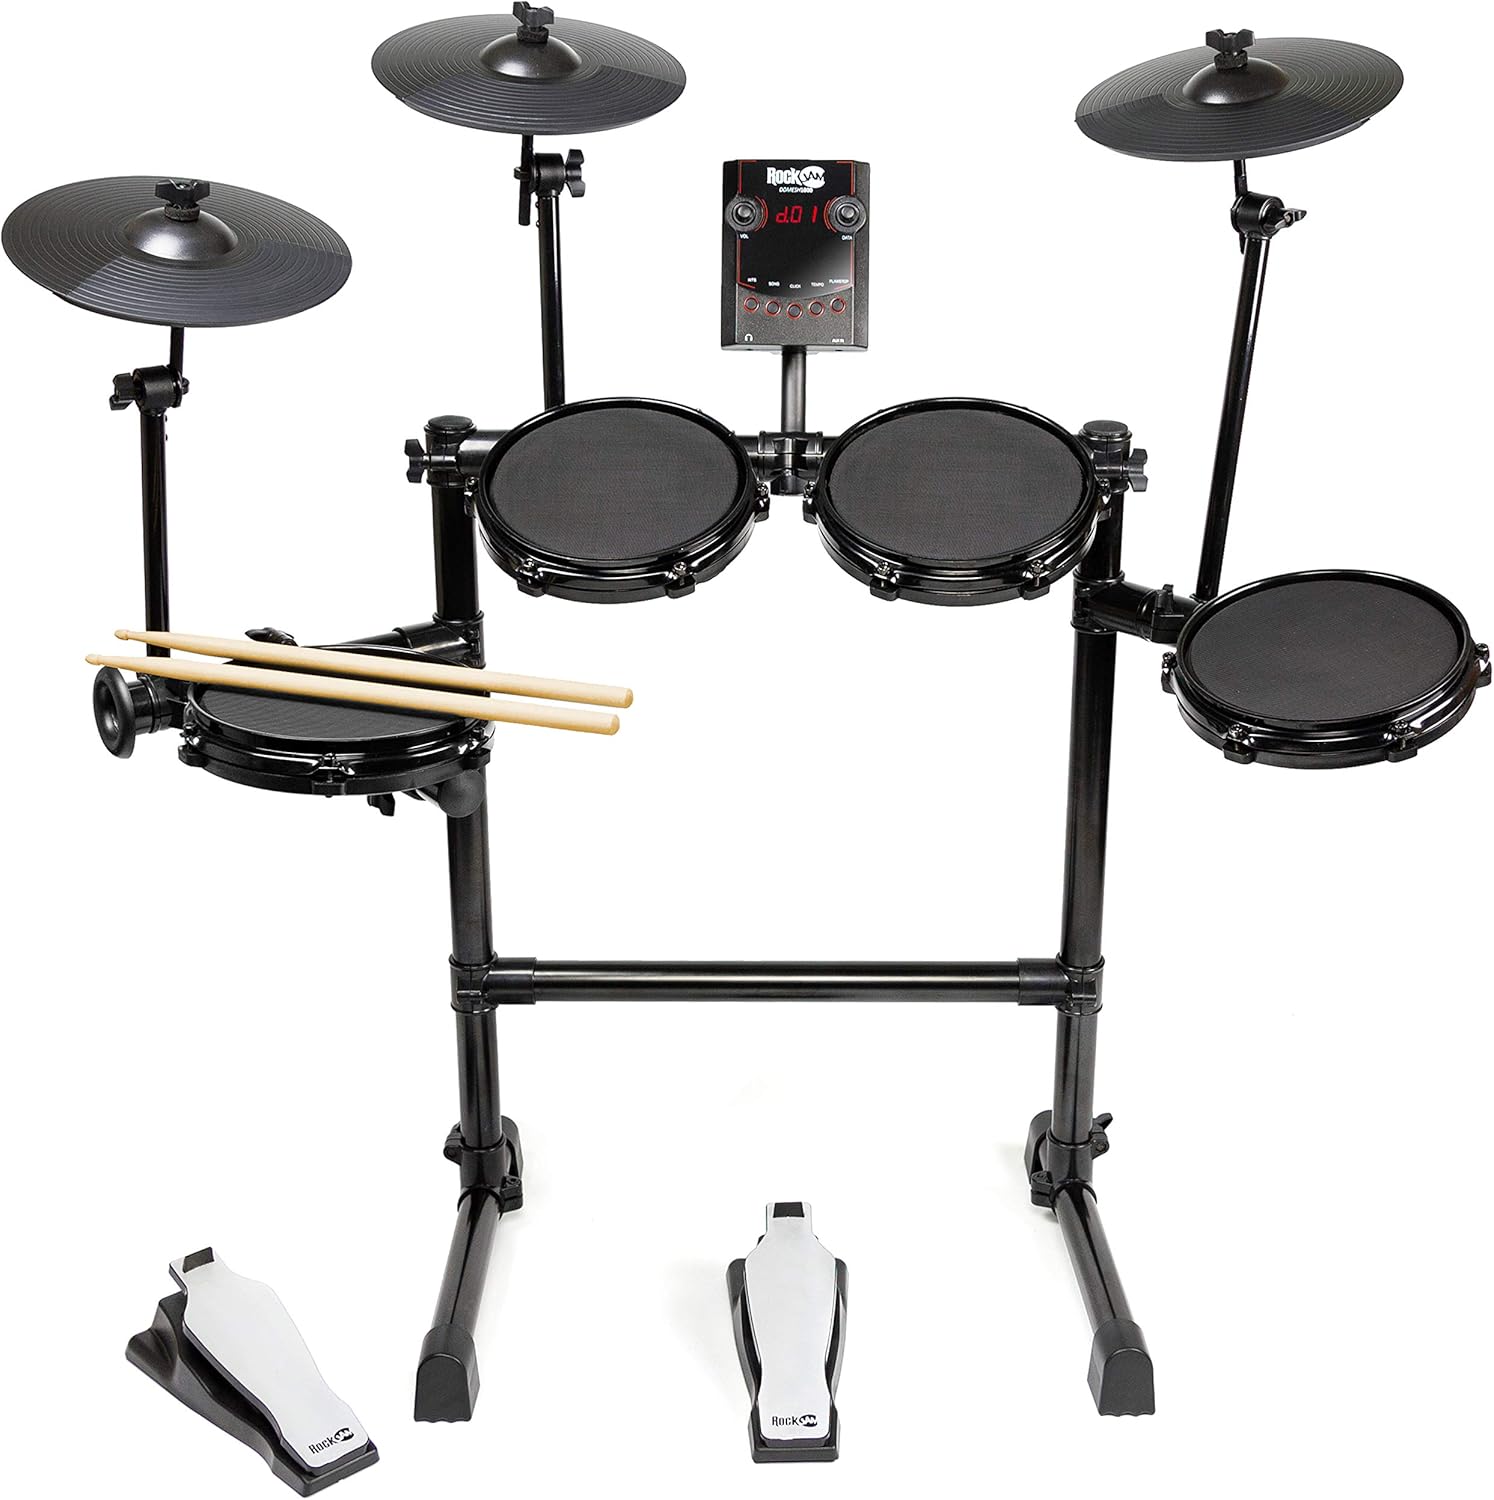
Image: The RockJam Mesh Head Electronic Drum Kit fully assembled, showing the drum pads, cymbal pads, drum module, and foot pedals.
3. Connecting the Drum Module
Mount the drum module to the center of the drum rack. Connect each drum pad, cymbal pad, and pedal to the corresponding input jacks on the rear of the drum module using the included cables. Ensure each cable is firmly inserted into its designated port.

Image: Rear panel of the drum module, displaying the L/MONO and R output jacks, USB port, AUX 1 and AUX 2 inputs, DC 10V power input, and power switch.
4. वीज जोडणी
Connect the included power adapter to the DC 10V input on the drum module and then plug it into a standard electrical outlet. Turn on the drum module using the power switch located on the rear panel.
ऑपरेटिंग सूचना
This section details the functions of the drum module and how to use your electronic drum kit.
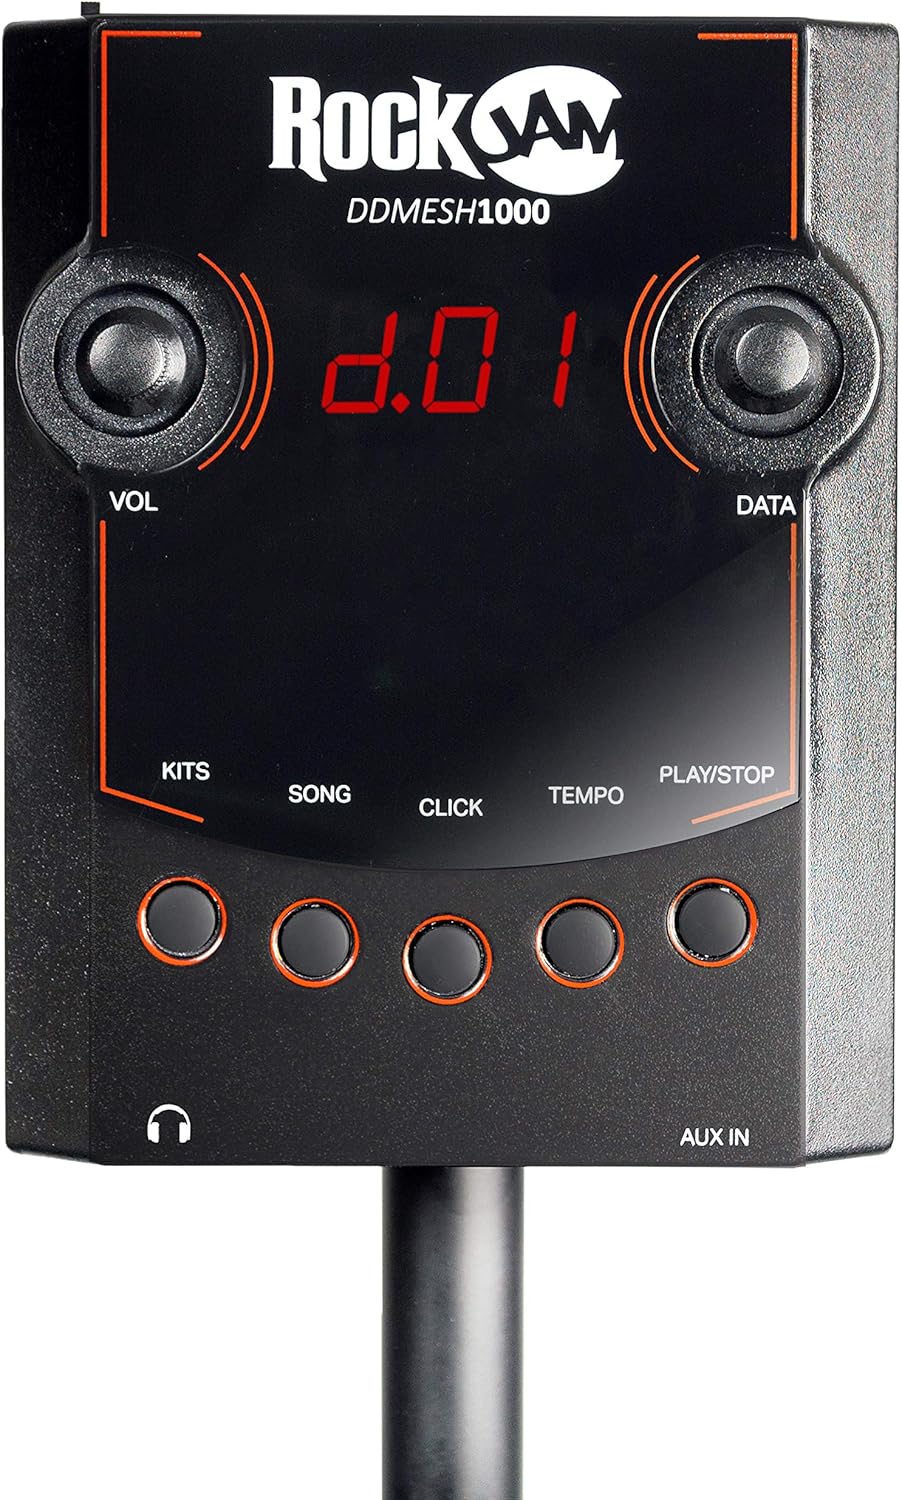
Image: Front panel of the drum module, showing the digital display, VOL and DATA knobs, and buttons for KITS, SONG, CLICK, TEMPO, and PLAY/STOP, along with headphone and AUX IN jacks.
1. Drum Module Controls
- व्हॉल नॉब: Adjusts the overall output volume of the drum module.
- DATA Knob: Used to navigate menus and select different kits, songs, or adjust parameters.
- KITS Button: Press to select from 30 authentic drum kits. Use the DATA knob to cycle through available kits.
- SONG Button: Press to select and play along with built-in demo songs. Use the DATA knob to choose a song.
- CLICK Button: Activates or deactivates the metronome (click track).
- टेम्पो बटण: Adjusts the tempo of the metronome or demo songs. Use the DATA knob to change the BPM.
- प्ले/स्टॉप बटण: Starts or stops playback of demo songs.
- हेडफोन जॅक: खाजगी प्रॅक्टिससाठी हेडफोन कनेक्ट करा.
- ऑक्स इन जॅक: Connect an external audio device (e.g., smartphone, MP3 player) to play along with your favorite music.
2. Playing the Kit
Once powered on, select a drum kit using the KITS button and DATA knob. Begin playing the mesh pads and rubber toms with the included drumsticks. The velocity-sensitive pads will respond to the force of your strikes, providing dynamic sound. Use the bass drum and hi-hat pedals to control their respective sounds.

प्रतिमा: जवळून पाहिलेला फोटो view of a mesh drum pad, highlighting its textured surface designed for realistic rebound and quiet practice.

प्रतिमा: जवळून पाहिलेला फोटो view of an electronic cymbal pad, showing its circular design and ribbed surface.

Image: The two electronic foot pedals for the bass drum and hi-hat, featuring a black base and a silver top surface with the RockJam logo.
3. कनेक्टिव्हिटी
- USB कनेक्टिव्हिटी: Connect the module to a computer via the USB port for MIDI data transfer. This allows you to use the kit as a MIDI controller for drum software or virtual instruments.
- MIDI आउटपुट: The module also features a dedicated MIDI output for connecting to other MIDI-compatible devices.
- ऑडिओ आउटपुट: Use the L/MONO and R output jacks to connect the drum module to an amplifier, mixer, or recording interface.
देखभाल
Proper maintenance ensures the longevity and optimal performance of your electronic drum kit.
- स्वच्छता: Use a soft, dry cloth to wipe down the drum module, pads, and frame. For stubborn dirt, a slightly damp cloth can be used, but ensure no moisture enters the electronic components. Avoid abrasive cleaners or solvents.
- Mesh Heads: The mesh heads are durable but can be damaged by sharp objects. Avoid striking them with anything other than drumsticks. They do not require tension adjustment like acoustic drum heads.
- केबल्स: Regularly check all cables for wear and tear. Ensure they are not kinked or pinched. When disconnecting, pull from the connector, not the cable itself.
- स्टोरेज: If storing the kit for an extended period, disconnect the power adapter and store it in a dry, temperate environment away from direct sunlight or extreme temperatures.
समस्यानिवारण
If you encounter issues with your RockJam electronic drum kit, refer to the following common problems and solutions.
- No Sound from Kit:
- Ensure the power adapter is securely connected and the module is turned on.
- Check the VOL knob on the module; ensure it is turned up.
- If using headphones or external speakers, ensure they are properly connected and their volume is adjusted.
- Verify that all drum and cymbal pads are correctly connected to their respective inputs on the module.
- Specific Pad/Cymbal/Pedal Not Responding:
- Check the cable connection for that specific pad/cymbal/pedal at both ends (pad and module).
- Ensure the cable is not damaged. Try swapping it with a known working cable if possible.
- Confirm the pad/cymbal/pedal is correctly mounted and not loose.
- Inconsistent or Unresponsive Playback at Higher Tempos:
- सर्व कनेक्शन सुरक्षित असल्याची खात्री करा.
- While mesh heads are velocity-sensitive, extreme rapid succession might occasionally lead to missed triggers if not struck cleanly. Practice consistent striking technique.
- If the issue persists, it may indicate a hardware limitation or fault.
- विकृत आवाज:
- Reduce the volume on the drum module or connected audio device.
- Check cable connections for any loose or damaged points.
जर या उपाययोजना करूनही समस्या कायम राहिली, तर अधिक मदतीसाठी कृपया वॉरंटी आणि सपोर्ट विभाग पहा.
तपशील
| वैशिष्ट्य | तपशील |
|---|---|
| मॉडेल क्रमांक | DDMESH1000 |
| ब्रँड | रॉकजॅम |
| उत्पादक | PDT UK Ltd |
| ड्रम पॅड | 4 x Velocity-Sensitive Mesh Head Pads (Snare, 3 Toms) |
| झांज पॅड | 3 x Cymbal Pads (Hi-Hat, Crash, Ride) |
| पेडल्स | Bass Drum Pedal, Hi-Hat Control Pedal |
| Drum Module Voices | 30 Authentic Drum Kits / Voices |
| कनेक्टिव्हिटी | USB, AUX In, Headphone Out, MIDI Out, L/MONO & R Audio Outputs |
| साहित्य | Rubber (pads), Mesh (heads), Metal (frame) |
| उत्पादनाचे वजन | ०.९ किलोग्रॅम (अंदाजे २ पौंड) |
| पॅकेजचे परिमाण | ४३ x २३ x ३५ सेमी (अंदाजे १६.९ x ९.१ x १३.८ इंच) |
| रंग | Black Heads |
हमी आणि समर्थन
Specific warranty details for the RockJam DDMESH1000 Electronic Drum Kit are not provided in this manual. Please refer to the product packaging, the manufacturer's official website, or your point of purchase for comprehensive warranty information.
For technical support, troubleshooting beyond this manual, or inquiries regarding parts and service, please visit the official RockJam website or contact their customer service department. Contact information is typically available on the manufacturer's webसाइट किंवा उत्पादन दस्तऐवजीकरण.


