1. परिचय
This manual provides detailed instructions for the installation, setup, and operation of the Sonew RFID 125KHz Standalone Access Control Keypad. This device is designed to provide secure access control for various applications, supporting multiple entry methods and user management.
2. सुरक्षितता माहिती
- Ensure all wiring is performed by a qualified professional to prevent electrical hazards.
- Do not expose the device to extreme temperatures, humidity, or direct water contact.
- फक्त निर्दिष्ट DC 12V पॉवर सप्लाय वापरा.
- डिव्हाइसला मजबूत इलेक्ट्रोमॅग्नेटिक फील्डपासून दूर ठेवा.
- Do not attempt to disassemble or repair the unit yourself. Contact support for assistance.
3. पॅकेज सामग्री
पॅकेजमध्ये सर्व वस्तू आहेत का ते तपासा:
- 1 x Sonew Metal Door Access Control Keypad
- 1 x इंग्रजी वापरकर्ता मॅन्युअल
- Mounting Screws and Wall Plugs (may vary)
4. उत्पादन संपलेview
The Sonew RFID 125KHz Standalone Access Control Keypad features a durable metallic case and a blue backlit keypad for enhanced visibility. It integrates a 125KHz proximity card reader and supports various access modes.
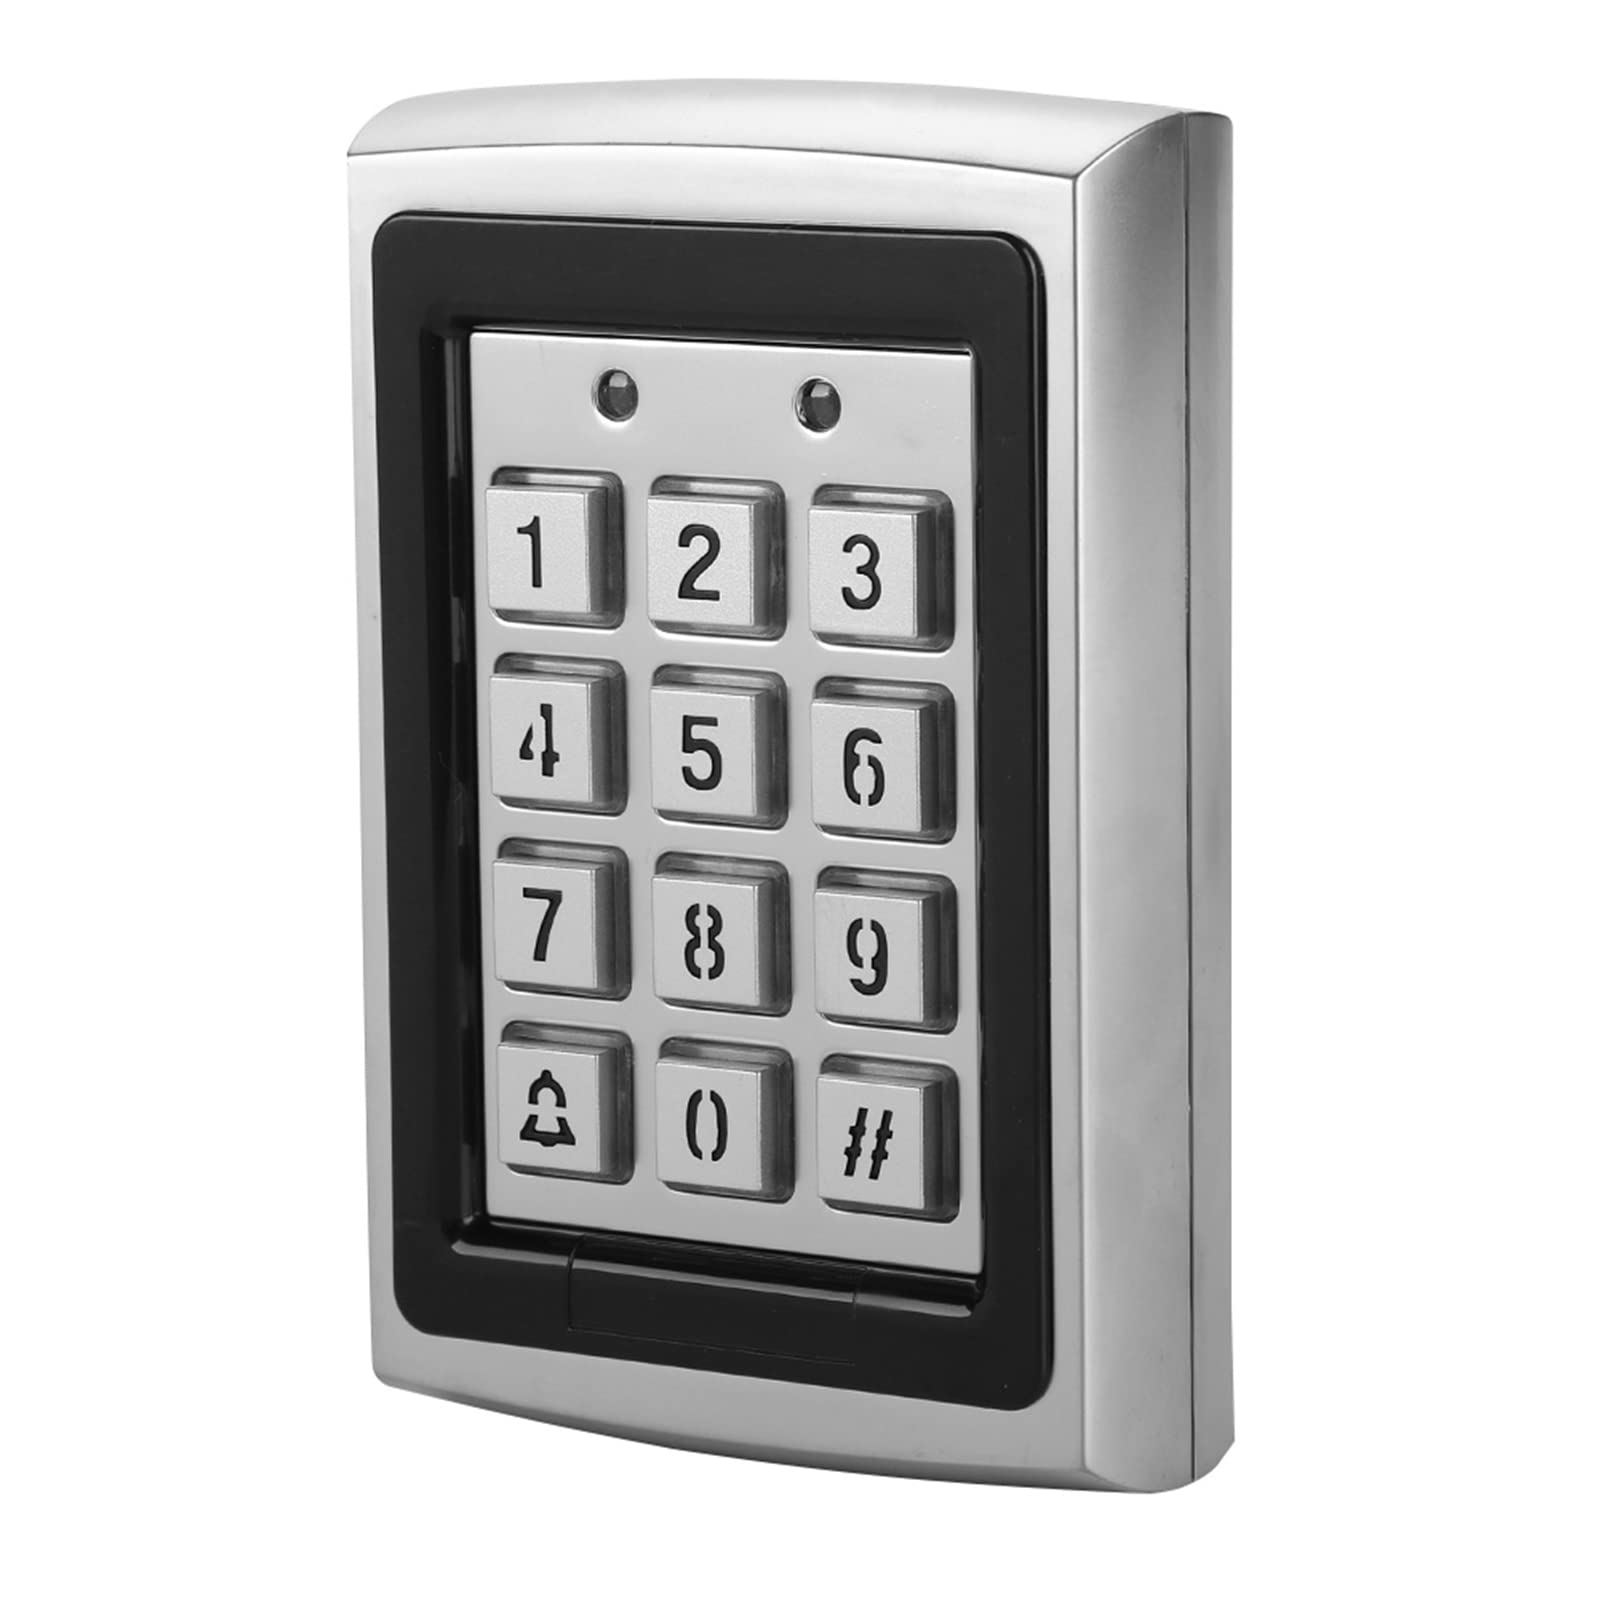
आकृती 4.1: समोर view of the Sonew RFID Access Control Keypad installed.

आकृती 4.2: मागील view of the keypad with wiring terminals and serial number. The serial number is 2018071083840.
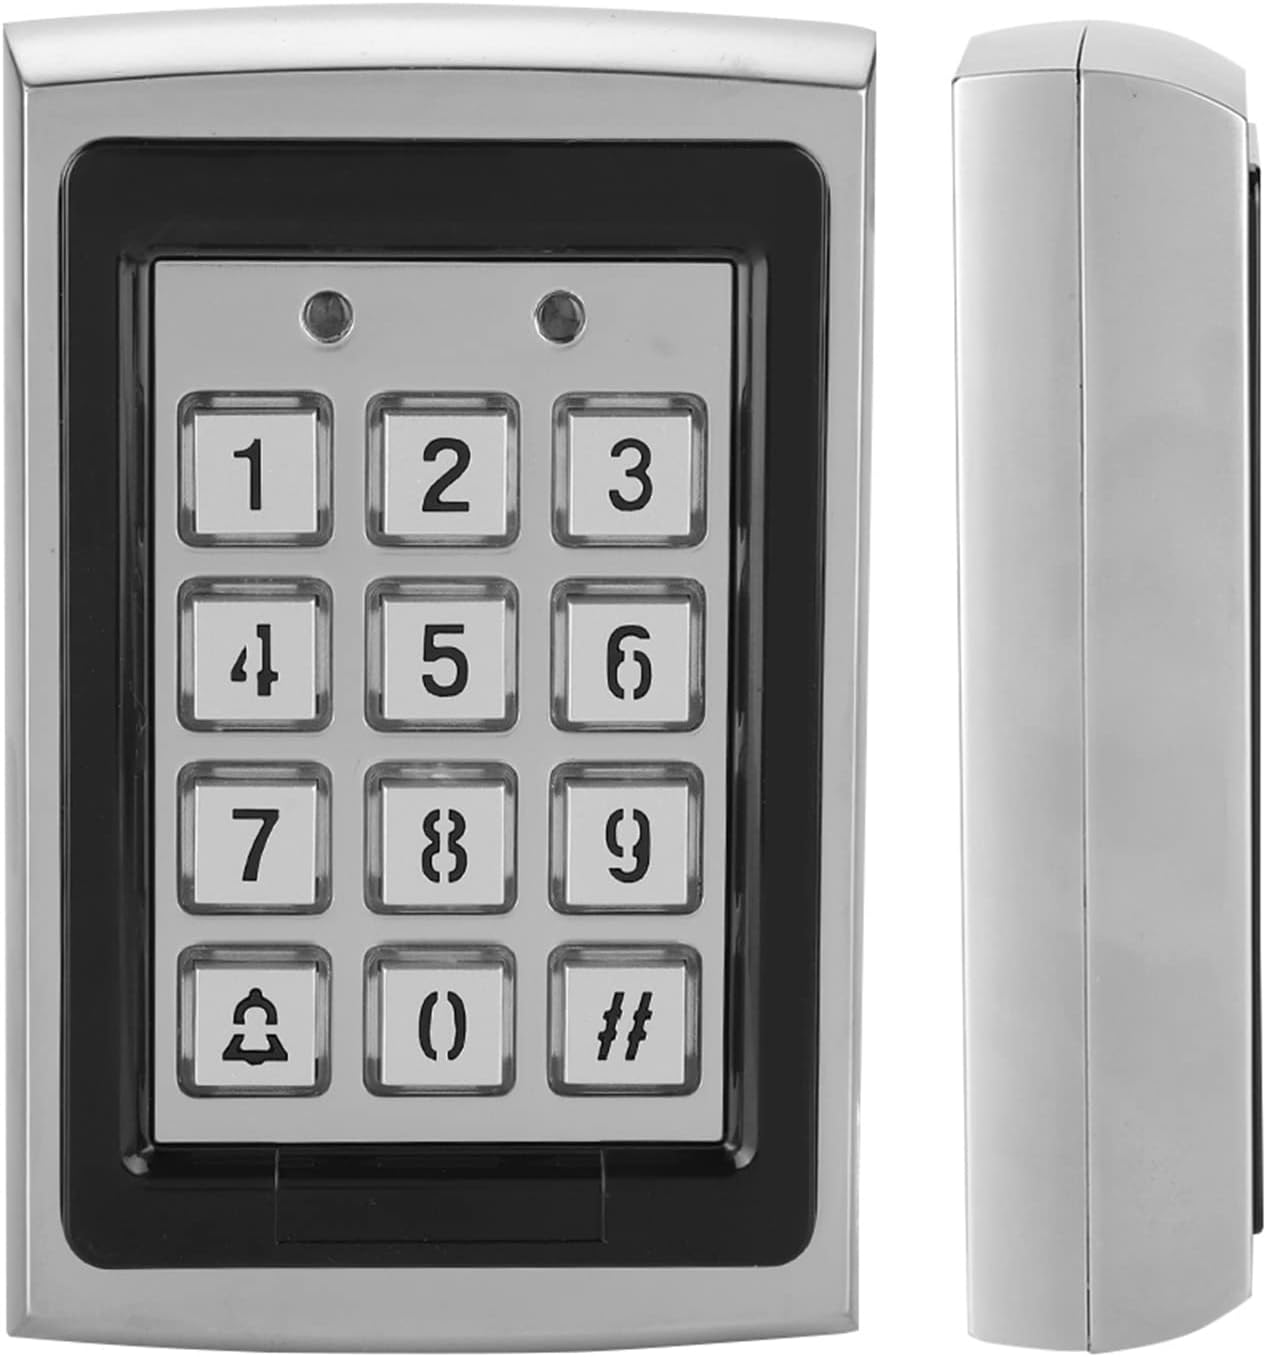
Figure 4.3: Front and side profile of the access control keypad.
प्रमुख वैशिष्ट्ये:
- Metallic case for durability.
- Blue backlit keypad for low-light conditions.
- Built-in 125KHz proximity card reader.
- Supports 1000 standard users.
- Multiple entry modes: Password Only, ID Card Only, Password + ID Card.
- Lock relay output (NO/NC).
- Alarm function with internal buzzer.
- 8 Auxiliary Modes (door ajar, forced door, shunt, door monitor, normal/secure).
- 3 User Levels: Normal User, Secure User, Master User.
5. तपशील
| ब्रँड | सोनव |
| मॉडेल क्रमांक | Sonewyfevd4kmx9 |
| रंग | चांदी |
| कार्यरत खंडtage | डीसी 12V |
| Support Card Frequency | 125KHz |
| सपोर्ट कार्ड प्रकार | ओळखपत्र |
| वापरकर्ता क्षमता | 1000 वापरकर्ते |
| प्रवेश पद्धती | Card, Password, Card + Password |
| साहित्य | मेटल केस |
| आयटमचे परिमाण (L x W x H) | ६ x ५ x ३ इंच (अंदाजे १५.२ x १२.७ x ७.६ सेमी) |
| आयटम वजन | ०.४ किलोग्रॅम (अंदाजे १४.१ औंस) |
| कनेक्टिव्हिटी तंत्रज्ञान | वायर्ड |
| नियंत्रण पद्धत | स्पर्श करा |
6. स्थापना
Proper installation is crucial for the functionality and security of the access control system. It is recommended that installation be performed by a qualified technician.
५.१ कीपॅड बसवणे
- स्थान निवडा: Select a suitable indoor location near the door to be controlled. Ensure the surface is flat and stable.
- मार्क ड्रिलिंग पॉइंट्स: Use the back plate of the keypad as a template to mark the drilling points for mounting screws.
- छिद्रे ड्रिल: Drill holes at the marked points. Insert wall plugs if mounting on masonry or drywall.
- सुरक्षित कीपॅड: Attach the keypad to the wall using the provided screws. Ensure it is firmly secured.
6.2 Wiring Diagram (General Guidance)
The keypad requires connection to a DC 12V power supply, an electric lock (NO/NC), and optionally an exit button or door sensor. Refer to the specific wiring diagram included in your package for precise connections. A general wiring setup involves:
- पॉवर इनपुट: Connect DC 12V power to the designated terminals.
- लॉक आउटपुट: Connect the electric lock to the NO (Normally Open) or NC (Normally Closed) terminals, depending on your lock type and desired security state.
- बाहेर पडा बटण: Connect an exit button to allow egress from the secured area.
- दरवाजा सेन्सर: (Optional) Connect a door sensor to monitor door status (ajar, forced open).
- अलार्म आउटपुट: (Optional) Connect to an external alarm system if desired.
टीप: Incorrect wiring can damage the device or connected components. Always double-check connections before applying power.
7. Setup & Programming
The keypad requires initial programming to set up the master password and add users. The default master password is typically 123456 (or similar, check your specific manual). It is highly recommended to change this immediately after installation.
7.1 प्रोग्रामिंग मोडमध्ये प्रवेश करणे
- दाबा # then enter the 6-digit Master Password (default: 123456).
- दाबा # again. The indicator light will change, indicating entry into programming mode.
7.2 Changing the Master Password
- Enter Programming Mode (Section 7.1).
- दाबा 0.
- Enter your new 6-digit Master Password.
- Enter the new Master Password again to confirm.
- दाबा # to save and exit this setting.
7.3 Adding Users (ID Cards / Passwords)
The system supports up to 1000 users. Each user can be assigned an ID card, a password, or both.
- प्रोग्रामिंग मोड प्रविष्ट करा.
- दाबा 1 to add a user.
- For ID Card User: Present the ID card to the reader. The system will beep to confirm.
- For Password User: Enter a 4-6 digit user password, then press #. Enter the password again, then press #.
- For Card + Password User: Present the ID card, then enter a 4-6 digit user password, then press #. Enter the password again, then press #.
- To add more users, repeat steps 3-5. Press # to exit user adding mode.
7.4 वापरकर्ते हटवणे
- प्रोग्रामिंग मोड प्रविष्ट करा.
- दाबा 2 to delete a user.
- To delete by ID Card: Present the ID card to the reader.
- To delete by User ID Number: Enter the User ID Number (e.g., 001, 002), then press #.
- To delete more users, repeat steps 3-4. Press # to exit user deleting mode.
7.5 Exiting Programming Mode
दाबा * to exit programming mode at any time.
8. ऑपरेशन
Once programmed, users can gain access using their assigned credentials.
8.1 Accessing with ID Card
- Present your registered ID card to the RFID reader area on the keypad.
- A successful read will trigger the lock to open for a preset duration.
8.2 Accessing with Password
- Enter your registered user password.
- दाबा #.
- If the password is correct, the lock will open.
8.3 Accessing with ID Card + Password
- Present your registered ID card to the RFID reader.
- Immediately enter your registered user password.
- दाबा #.
- If both credentials are correct, the lock will open.
8.4 अलार्म कार्य
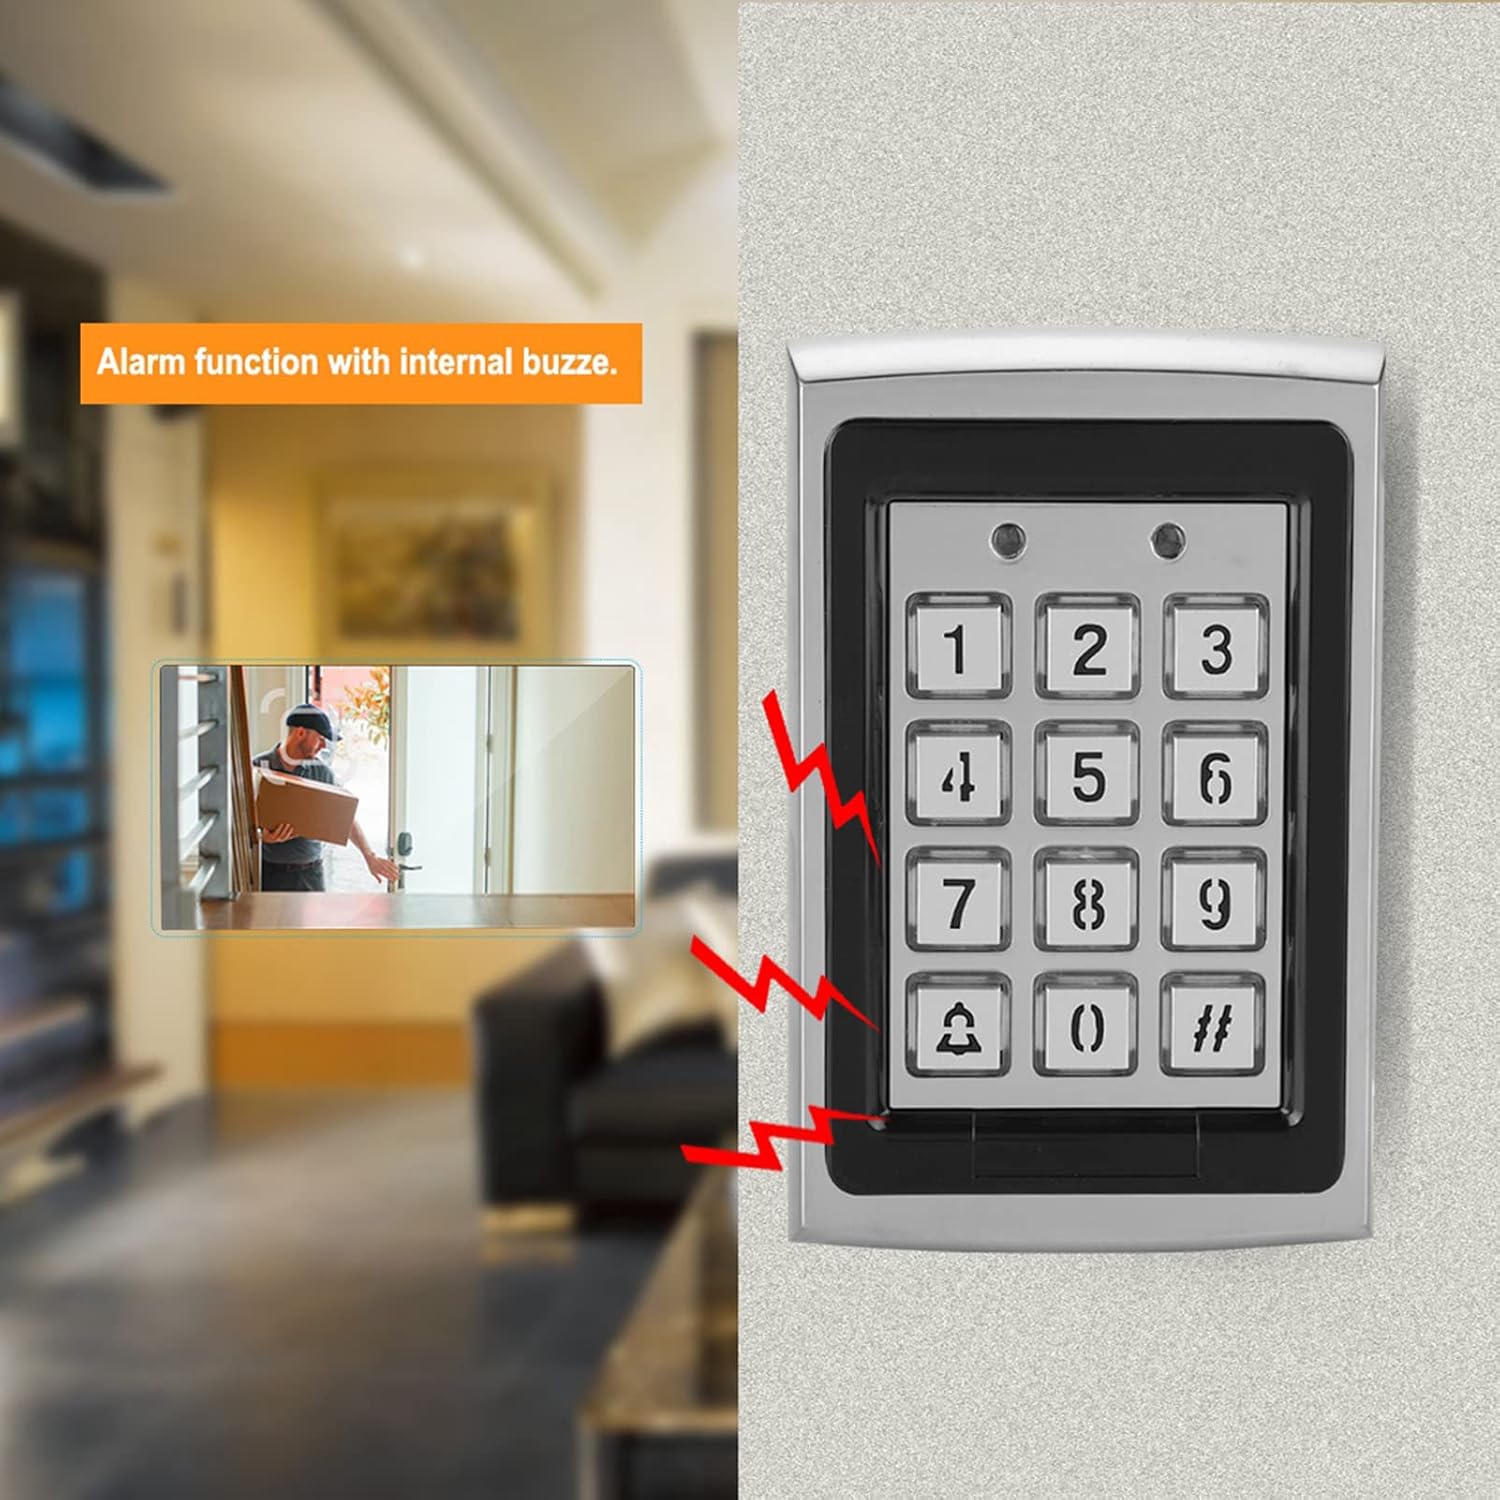
Figure 8.1: Visual representation of the alarm function with internal buzzer.
The keypad features an internal buzzer for alarm functions. This can be triggered by events such as forced entry, door ajar for too long, or multiple incorrect password attempts. Refer to your specific manual for programming auxiliary modes related to the alarm.
9. देखभाल
- स्वच्छता: Wipe the keypad surface with a soft, dry cloth. Do not use abrasive cleaners or solvents.
- नियमित तपासणी: Periodically check wiring connections for looseness or damage.
- सॉफ्टवेअर अपडेट्स: (If applicable) Check the manufacturer's webकोणत्याही फर्मवेअर अद्यतनांसाठी साइट.
- Backup User Data: For critical installations, keep a record of user IDs and passwords.
10. समस्या निवारण
| समस्या | संभाव्य कारण | उपाय |
|---|---|---|
| कीपॅड चालू होत नाही. | वीजपुरवठा नाही; चुकीची वायरिंग; सदोष पॉवर अॅडॉप्टर. | Check DC 12V power connection. Verify wiring according to the diagram. Test power adapter. |
| Door does not unlock. | Incorrect ID card/password; card not registered; lock wiring issue; lock malfunction. | Ensure correct credentials. Verify user is registered. Check lock wiring (NO/NC). Test the electric lock independently. |
| प्रोग्रामिंग मोडमध्ये प्रवेश करू शकत नाही. | Incorrect Master Password; keypad malfunction. | Ensure the correct Master Password is used. If forgotten, a factory reset might be necessary (refer to your specific manual for reset procedures, as this may delete all user data). |
| अनपेक्षितपणे अलार्म वाजतो. | Door left ajar; forced entry attempt; tampएर अलार्म ट्रिगर झाला. | Check door status. Inspect for tampering. Review auxiliary mode settings. |
९. सपोर्ट आणि वॉरंटी
For technical assistance, warranty claims, or further inquiries, please contact Sonew customer support through your purchase platform or the official Sonew website. Please have your model number (Sonewyfevd4kmx9) and serial number (if applicable, e.g., 2018071083840) ready when contacting support.
Sonew is committed to providing quality products and support. If you encounter any issues with the product itself, please reach out to us for assistance.