परिचय
This manual provides detailed instructions for the installation, operation, maintenance, and troubleshooting of your ASUS TUF GAMING Z890-PLUS WIFI motherboard. Designed for Intel Core Ultra 200S Plus and 200S Series processors, this ATX motherboard features DDR5 memory support, PCIe 5.0, Wi-Fi 7, and Intel 2.5 Gb Ethernet, offering a robust foundation for high-performance computing.
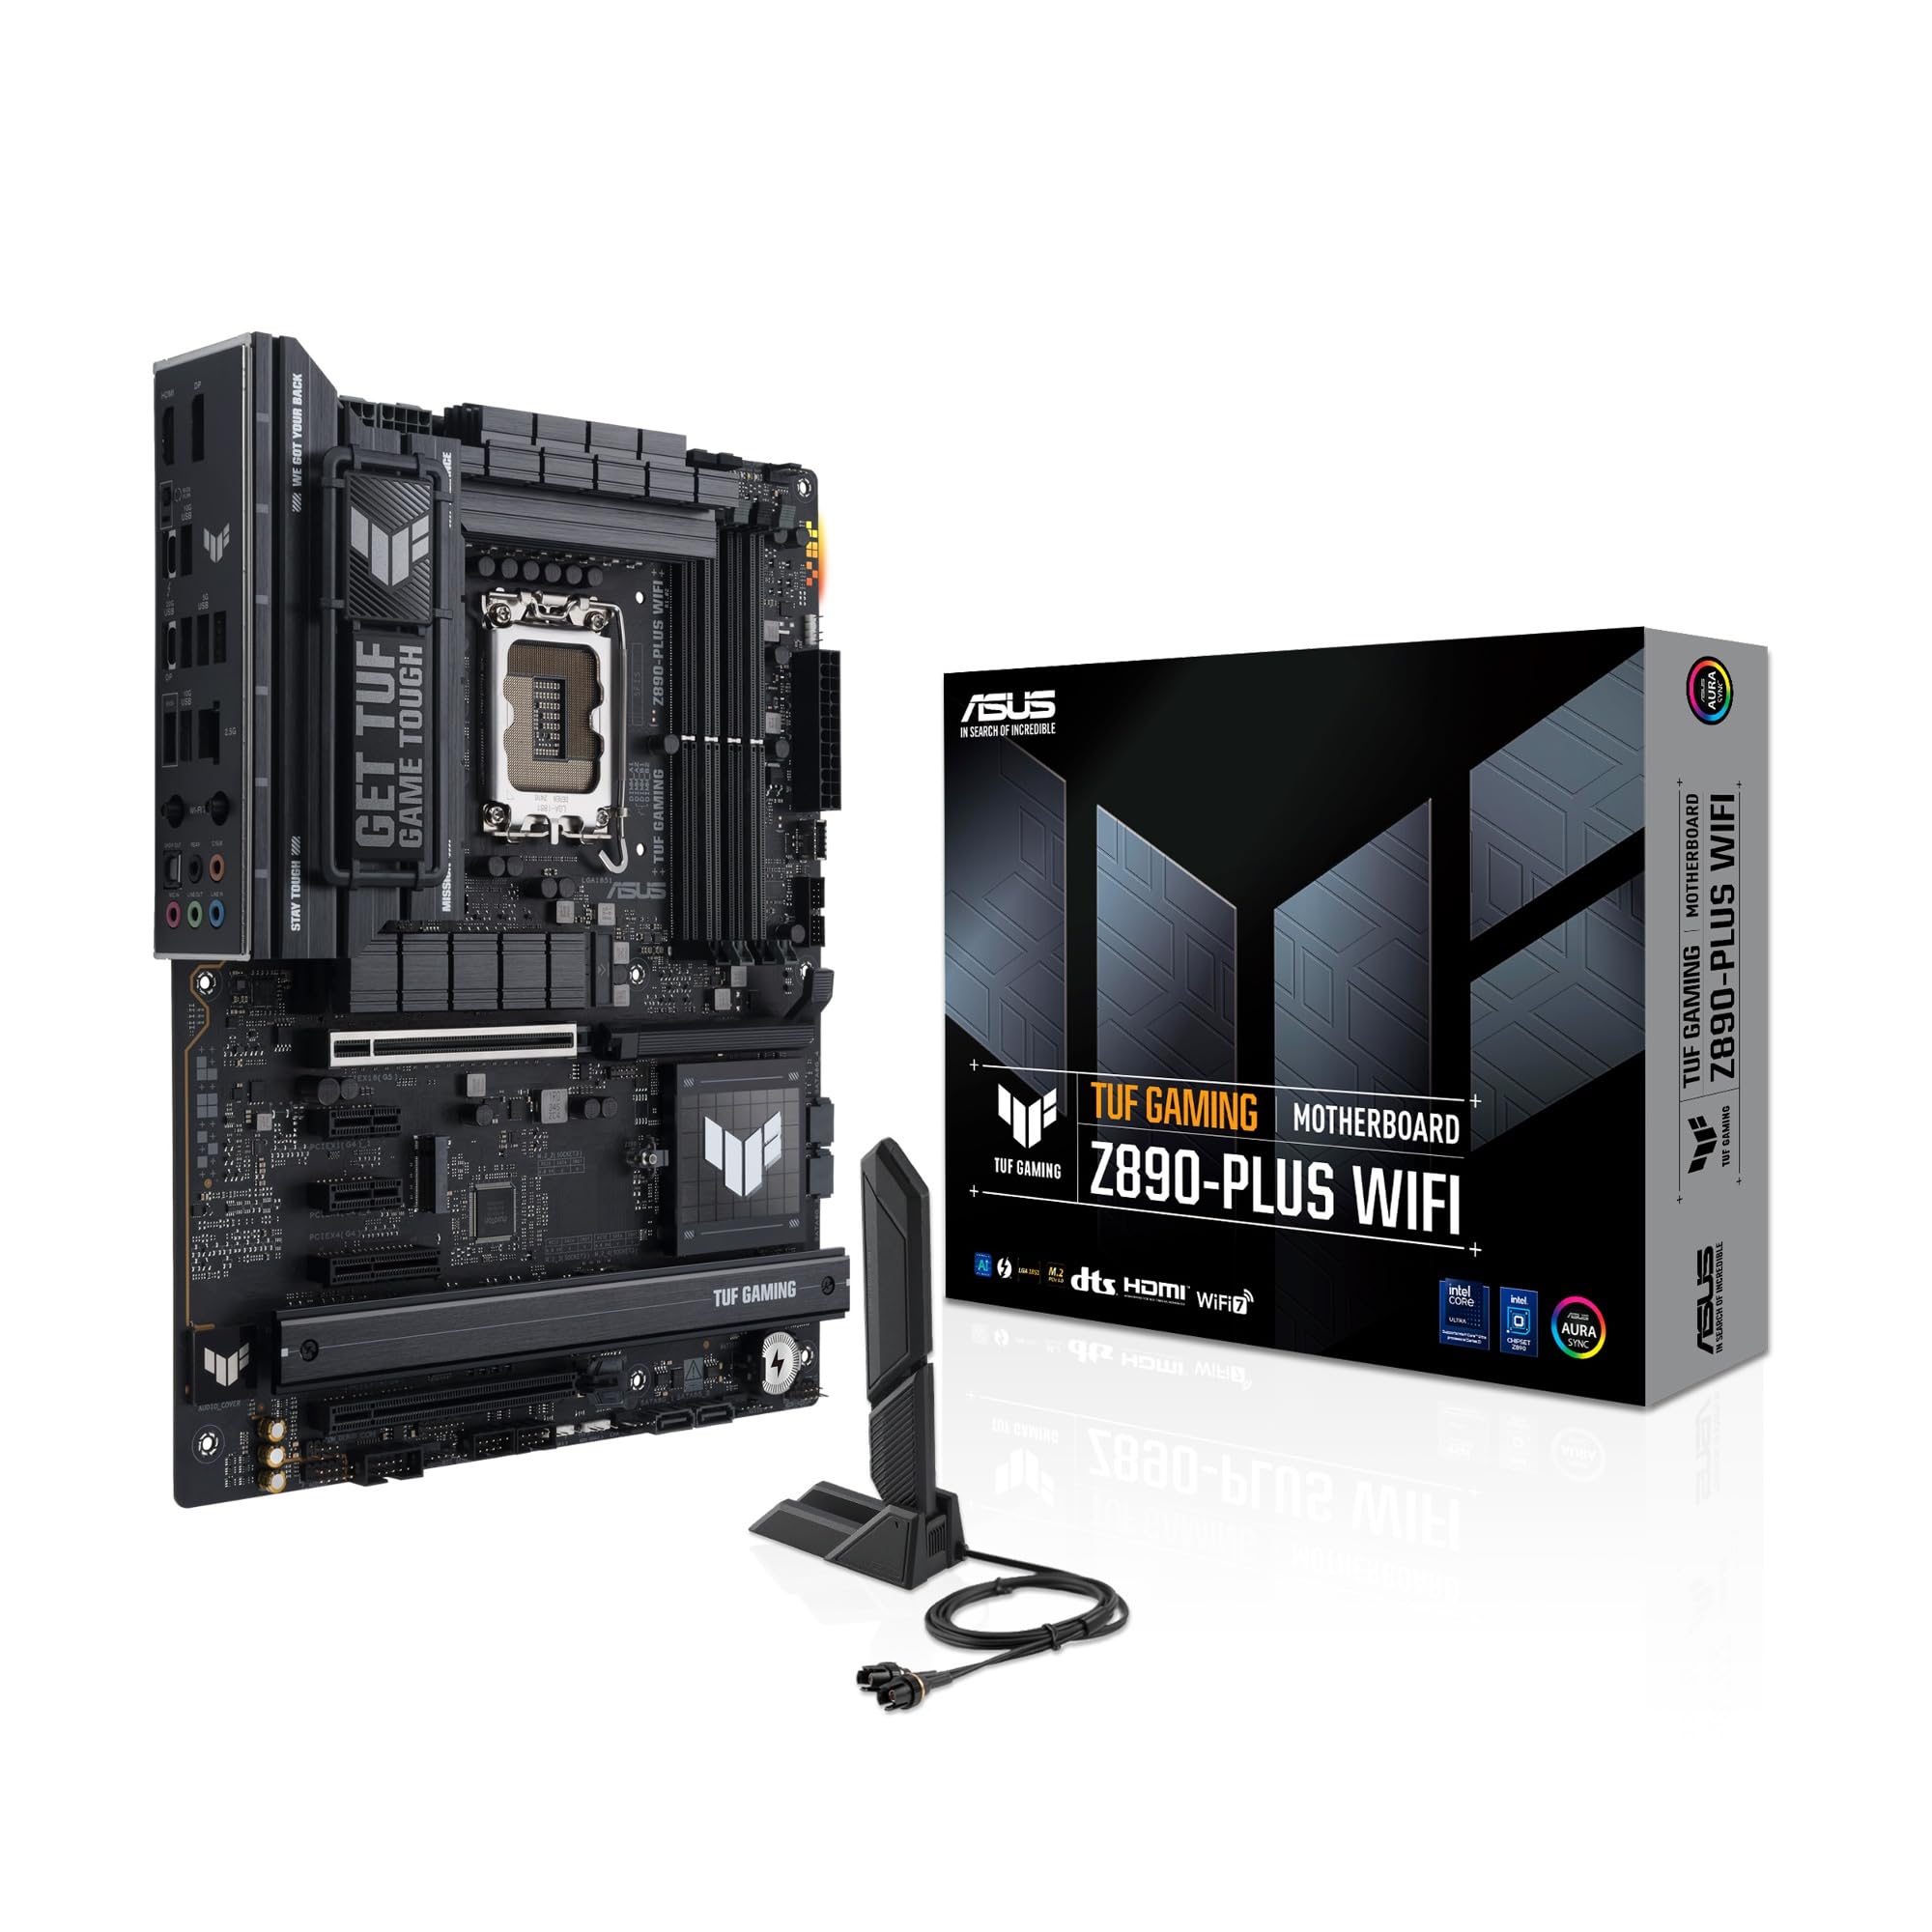
Figure 1: ASUS TUF GAMING Z890-PLUS WIFI Motherboard with its retail packaging and included Wi-Fi antenna.
सेटअप आणि स्थापना
तुमच्या मदरबोर्ड आणि त्याच्या घटकांच्या योग्य स्थापनेसाठी या चरणांचे अनुसरण करा.
२.१. अनपॅकिंग आणि प्रारंभिक तपासणी
Carefully remove all components from the packaging. Verify that all items listed in the 'What's in the Box' section are present and inspect the motherboard for any visible damage.

Figure 2: Contents typically found in the ASUS TUF GAMING Z890-PLUS WIFI retail box.
१. सीपीयू इंस्टॉलेशन (एलजीए १७००)
Open the CPU socket retention lever. Align the triangular mark on your Intel processor with the corresponding mark on the socket. Gently place the CPU into the socket, ensuring it sits flush. Close the retention lever to secure the CPU.

आकृती 3: ओव्हरview of the motherboard layout, showing the LGA 1851 CPU socket.
३.२. मेमरी (RAM) स्थापना
This motherboard supports DDR5 memory modules. Open the clips on the DIMM slots. Align the notch on the DDR5 memory module with the key in the DIMM slot. Press down firmly on both ends of the memory module until the clips snap into place. The motherboard supports up to 256GB of DDR5 RAM across its four slots.
4. Storage (M.2 SSD) Installation
The motherboard features multiple M.2 slots for high-speed NVMe SSDs. Utilize the ASUS M.2 Q-Latch and M.2 Q-Release features for tool-less installation. To install, remove the M.2 heatsink (if present) by tapping the M.2 Q-Release button. Insert the M.2 SSD into the slot, then secure it with the M.2 Q-Latch mechanism. The M.2 Q-Slide design accommodates various SSD sizes.

Figure 4: EZ PC DIY features for simplified component installation, including M.2 Q-Latch and Q-Release.

Figure 5: Demonstrating the M.2 heatsink removal process.
२.५. एक्सपेंशन कार्ड इन्स्टॉलेशन (PCIe)
Insert your graphics card or other PCIe expansion cards into the appropriate PCIe slots. The primary PCIe 5.0 x16 slot is designed for next-generation GPUs. Use the PCIe Slot Q-Release button to easily unlock the security latch for card removal.

Figure 6: Layout of PCIe slots, indicating PCIe 5.0 and PCIe 4.0 compatibility.
३.४. पेरिफेरल्स आणि पॉवर कनेक्ट करणे
Connect your power supply unit (PSU) cables to the motherboard's 24-pin ATX power connector and CPU power connectors. Attach front panel connectors (USB, audio, power/reset switches) to their respective headers. Install the included Wi-Fi antenna to the rear I/O panel for Wi-Fi 7 connectivity. Connect USB devices, Ethernet cables, and display outputs as needed.

Figure 7: Detail of a USB header for connecting front panel USB ports.

Figure 8: The rear input/output panel, showing various ports and the Wi-Fi antenna connection.
तुमचा मदरबोर्ड चालवणे
Once assembled, power on your system and configure the BIOS/UEFI settings.
३.१. BIOS/UEFI कॉन्फिगरेशन
Access the BIOS/UEFI setup utility by pressing the 'Delete' or 'F2' key during system startup. The intuitive interface allows for easy navigation and configuration of system settings, boot order, and hardware parameters.
2. AI Intelligence Features
The ASUS TUF GAMING Z890-PLUS WIFI motherboard integrates several AI-powered features to enhance user experience and system performance:
- एआय सल्लागार: Utilizes AI technology to understand natural-language questions, helping users explore motherboard functionality and BIOS settings.
- एआय कूलिंग II: Optimizes thermal performance and reduces noise through dynamic adjustment of fan speeds based on CPU temperatures.
- एआय नेटवर्किंग II: Optimizes network performance for seamless connectivity and maximized Wi-Fi 7 speeds.

आकृती 9: ओव्हरview of the motherboard's AI Intelligence features.

Figure 10: The AI Advisor interface, providing assistance with motherboard functions.
3. Performance Optimization
Leverage advanced features for optimal system performance:
- AEMP III: Advanced firmware for unparalleled memory performance with cutting-edge DDR5 modules.
- DIMM फिट: ASUS-एक्सक्लुझिव्ह BIOS वैशिष्ट्य जे कार्यप्रदर्शन ऑप्टिमाइझ करण्यासाठी आणि संभाव्य समस्या ओळखण्यासाठी वैयक्तिक मेमरी मॉड्यूल्सचे अचूक विश्लेषण करते.
- एनपीयू बूस्ट: This BIOS feature overclocks the NPU with one click, increasing कामगिरी २४% पर्यंत वाढली.

Figure 11: Key performance enhancement features of the motherboard.
देखभाल
योग्य देखभाल तुमच्या मदरबोर्डचे दीर्घायुष्य आणि स्थिर ऑपरेशन सुनिश्चित करते.
३. थर्मल व्यवस्थापन
The motherboard features an optimized thermal design, including large VRM heatsinks, M.2 heatsinks, and PCH heatsinks, along with hybrid fan headers and Fan Xpert 4 with AI Cooling II. Ensure proper airflow within your PC case and regularly clean dust from fans and heatsinks to maintain optimal temperatures.

Figure 12: The motherboard designed for efficient cooling, compatible with advanced cooling solutions.

Figure 13: AI Cooling II dynamically adjusts fan speeds for optimal thermal performance.
७.२. साफसफाई
Periodically clean the motherboard and internal components of your PC using compressed air to remove dust buildup. Ensure the system is powered off and unplugged before cleaning.
समस्यानिवारण
जर तुम्हाला समस्या येत असतील, तर खालील मूलभूत समस्यानिवारण पायऱ्या विचारात घ्या:
- शक्ती नाही: Check all power connections from the PSU to the motherboard and components. Ensure the power supply is switched on.
- कोणतेही प्रदर्शन नाही: Verify that the graphics card is properly seated and connected to the monitor. Test with a different display cable or monitor if possible.
- सिस्टम अस्थिरता: Ensure RAM modules are correctly installed. Check for proper CPU cooler installation. Update BIOS to the latest version.
- नेटवर्क समस्या: Confirm Wi-Fi antenna is securely attached. Check Ethernet cable connections. Utilize the AI Networking II feature for diagnostics.
- Consult AI Advisor: For specific issues, the AI Advisor can provide guidance based on natural language queries.
For more detailed troubleshooting, refer to the official ASUS support webसाइट किंवा सर्वसमावेशक वापरकर्ता मॅन्युअल PDF.
तपशील
Key technical specifications for the ASUS TUF GAMING Z890-PLUS WIFI motherboard:

आकृती 14: ओव्हरview of advanced connectivity and memory features.
| वैशिष्ट्य | तपशील |
|---|---|
| ब्रँड | ASUS |
| मॉडेलचे नाव | 90MB1IQ0-M0EAY0 |
| CPU सॉकेट | LGA 1851 |
| सुसंगत प्रोसेसर | Intel Core Ultra 200S Plus and 200S Series |
| चिपसेट प्रकार | इंटेल Z890 |
| रॅम तंत्रज्ञान | DDR5 |
| मेमरी क्लॉक स्पीड | 8600 MHz पर्यंत |
| कमाल रॅम क्षमता | 256 जीबी |
| मेमरी स्लॉट | 4 |
| ग्राफिक्स इंटरफेस | PCI-Express x16 (PCIe 5.0 supported) |
| Total PCI Slots | 4 |
| Total SATA Ports | 6 |
| एकूण यूएसबी पोर्ट | 15 (various types including USB4, USB 20Gbps) |
| इथरनेट | इंटेल २.५ जीबी इथरनेट |
| वायरलेस कनेक्टिव्हिटी | Wi-Fi 7 (802.11be) |
| परिमाण (LxWxH) | 24.4L x 24.4W x 1H सेमी |
| वजन | 1.5 किलोग्रॅम |

Figure 15: Highlighting the DDR5 memory speed support.

Figure 16: The integrated Intel 2.5 Gb Ethernet controller.
हमी आणि समर्थन
1. उत्पादन हमी
This ASUS motherboard comes with a 2 वर्षांची उत्पादन वॉरंटी खरेदीच्या तारखेपासून. वॉरंटी दाव्यांसाठी कृपया तुमचा खरेदीचा पुरावा जपून ठेवा.
2. उत्पादक संपर्क माहिती
For technical support, warranty inquiries, or further assistance, please contact ASUS:
- निर्माता: ASUS संगणक GmbH
- ईमेल: LegalCompliance@asus.com
- Webसाइट: https://www.asus.com/it/
- पत्ता: Harkortstraße 21-23, Ratingen, 40880, Germany
3. अतिरिक्त दस्तऐवजीकरण
Further detailed information can be found in the official PDF documents: