
1. परिचय
Thank you for choosing the NightBuddy Tactical LED Flashlight, Model 1. This manual provides essential information for the safe and effective operation, maintenance, and care of your new flashlight. Please read this manual thoroughly before use and retain it for future reference.
The NightBuddy Tactical LED Flashlight is designed for versatility and durability, featuring a powerful 5000-lumen LED, multiple light modes, adjustable focus, and a robust aluminum alloy body. It also includes a USB output for charging other devices and an emergency window breaker.
2. पॅकेज सामग्री
पॅकेज उघडताना, कृपया खालील सर्व वस्तू समाविष्ट आहेत याची खात्री करा:
- 1 x NightBuddy Tactical LED Flashlight
- 1 x Rechargeable Lithium Ion Battery (pre-installed or separate)
- 1 x USB चार्जिंग केबल
- 1 x संरक्षक स्टोरेज केस
- १ x वापरकर्ता मॅन्युअल (हे दस्तऐवज)
3. तपशील
| वैशिष्ट्य | तपशील |
|---|---|
| ब्रँड | NightBuddy |
| मॉडेल क्रमांक | 1 |
| परिमाण | 22 x 12.52 x 6.5 सेमी |
| वजन | 544 ग्रॅम |
| साहित्य | ॲल्युमिनियम मिश्र धातु |
| प्रकाश स्रोत | LED (5000 Lumens) |
| उर्जा स्त्रोत | 1 x Lithium Ion Battery (included) |
| जलरोधक रेटिंग | IPX7 |
| प्रकाश मोड | उच्च, मध्यम, निम्न, स्ट्रोब, एसओएस |
| विशेष वैशिष्ट्ये | Adjustable Focus, USB Output (Power Bank), Emergency Window Breaker |
4. सेटअप
4.1 बॅटरी इंस्टॉलेशन
- फ्लॅशलाइट घड्याळाच्या उलट दिशेने वळवून त्याची टेल कॅप उघडा.
- Insert the provided rechargeable Lithium Ion battery with the positive (+) end facing towards the flashlight head.
- शेपटीची टोपी घट्ट होईपर्यंत घड्याळाच्या दिशेने परत स्क्रू करा.
4.2 प्रारंभिक चार्जिंग
Before first use, fully charge the flashlight battery. The integrated LED power display will show the battery percentage.
- Locate the USB charging port on the side of the flashlight, usually protected by a rubber cover.
- Open the rubber cover and insert the smaller end of the provided USB charging cable into the flashlight's port.
- Connect the larger end of the USB cable to a compatible USB power adapter (not included) or a computer USB port.
- The LED display will indicate the charging status. Once the display shows 100%, the flashlight is fully charged.
- Disconnect the charging cable and securely close the rubber cover to maintain the IPX7 waterproof rating.
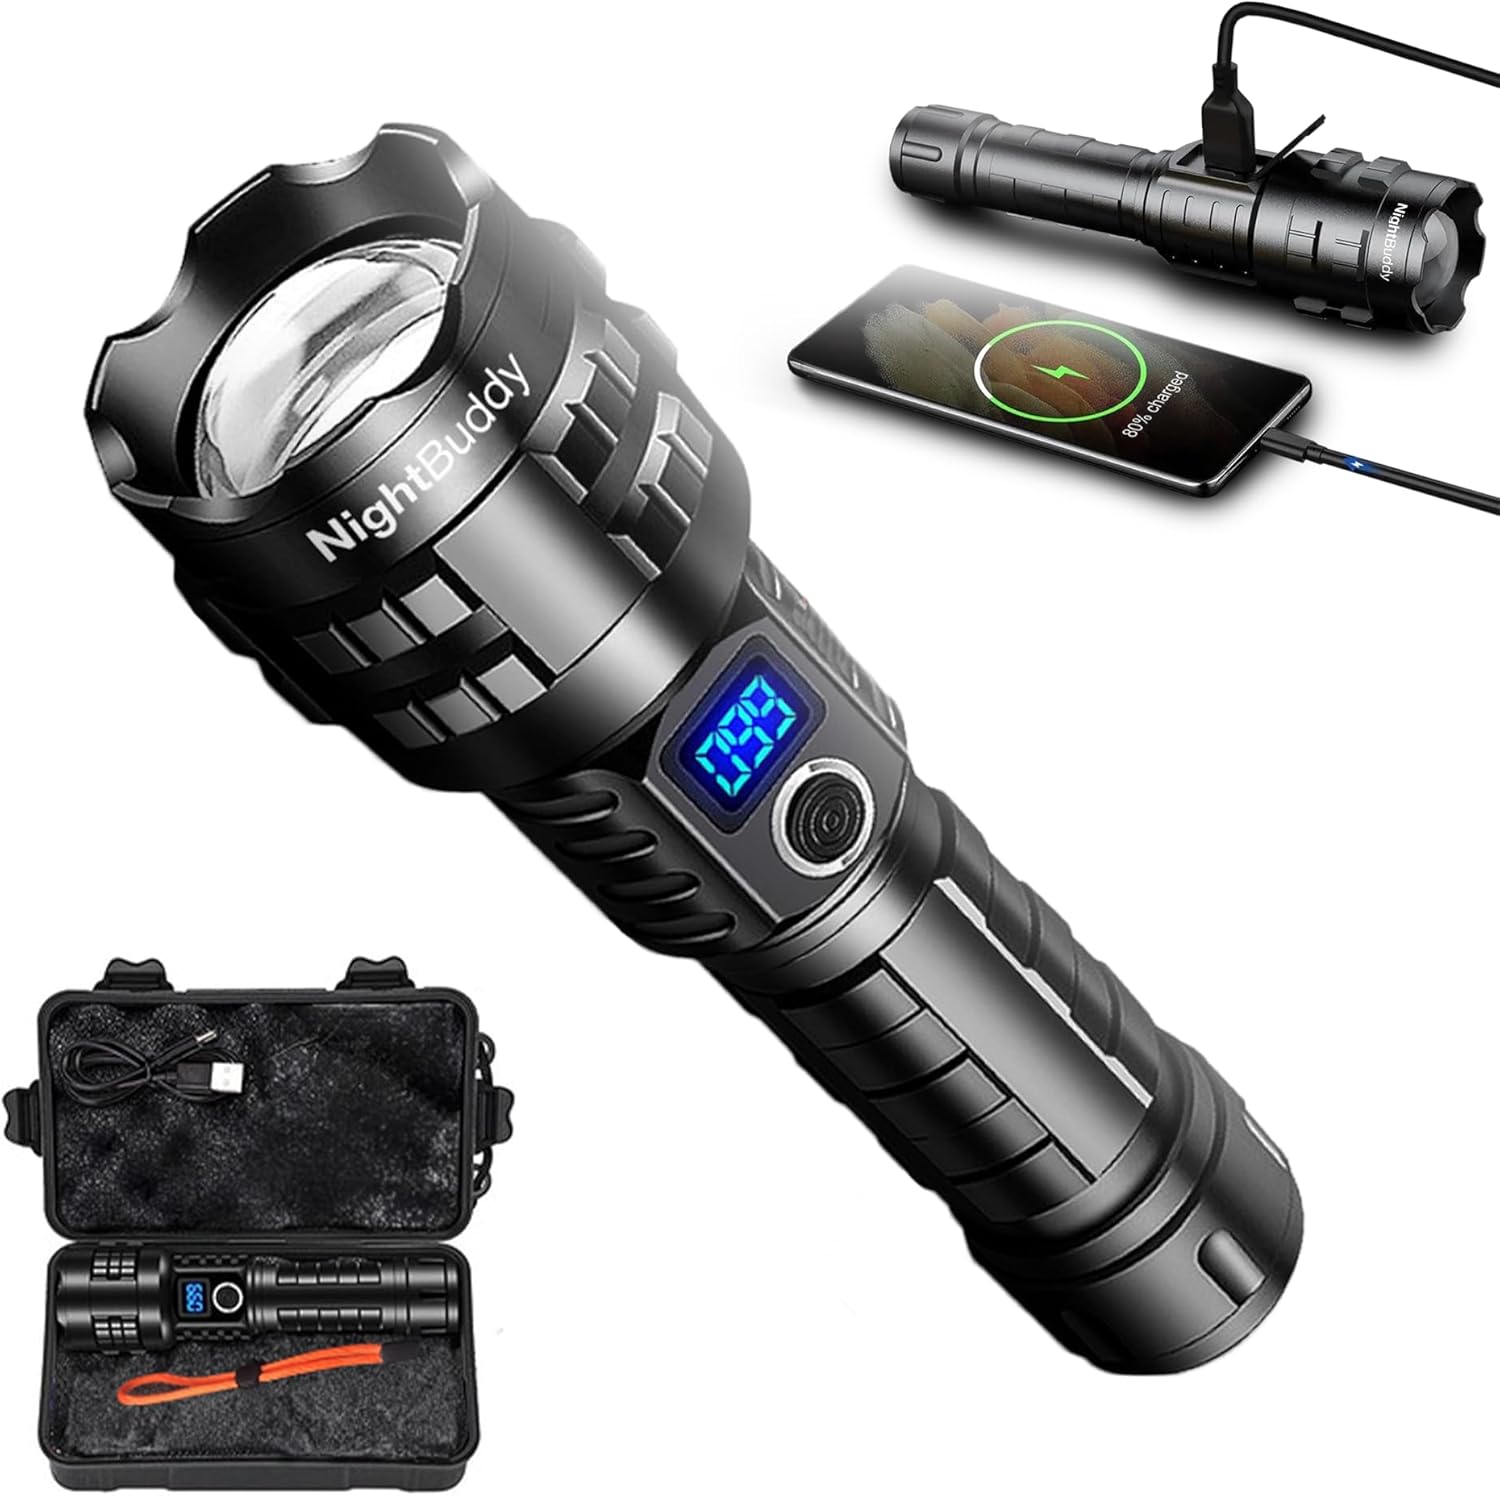
Image: The NightBuddy Tactical LED Flashlight shown with its protective case and a USB charging cable. The flashlight features an LED display and a side button.
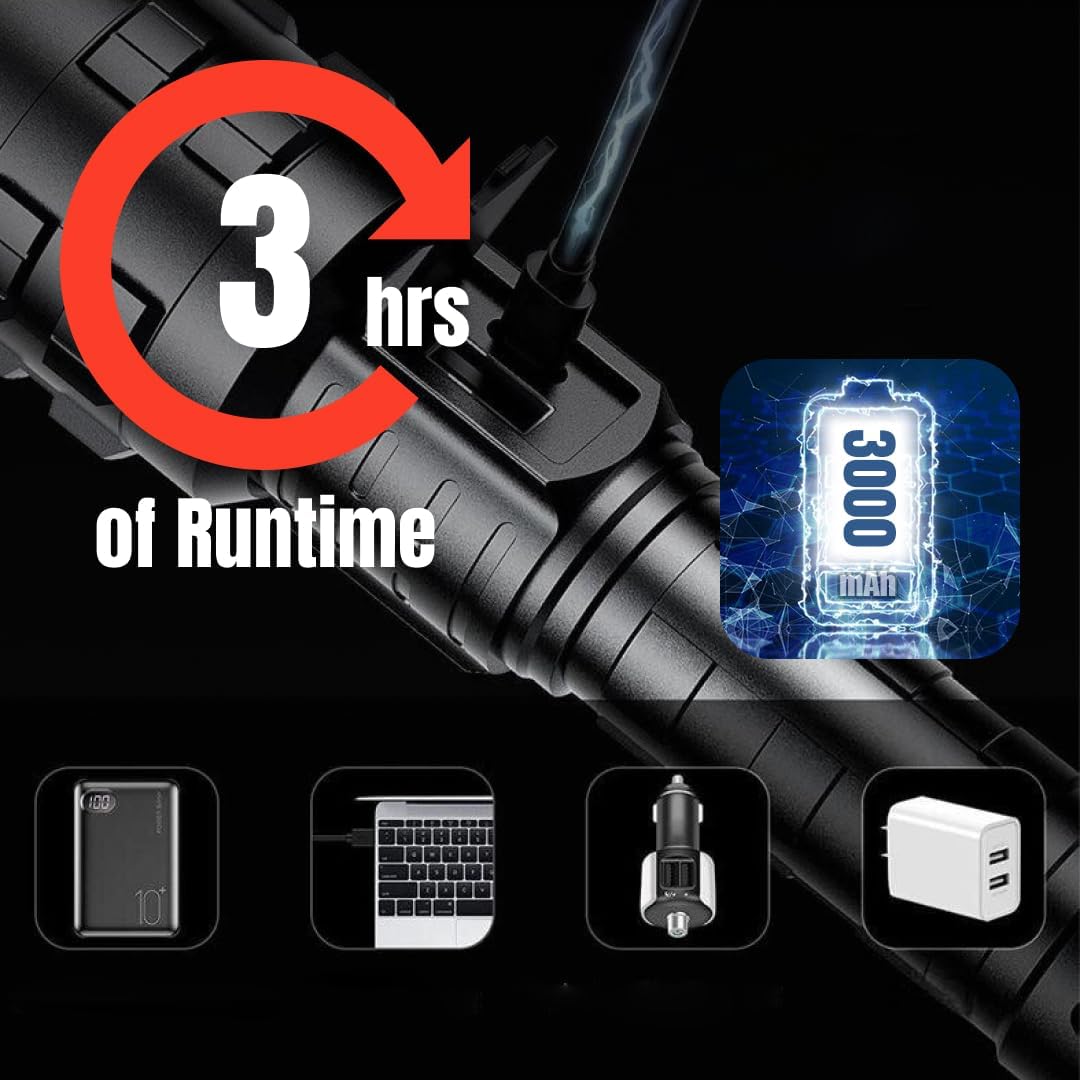
Image: A close-up of the NightBuddy flashlight being charged via its USB port, indicating a 3-hour runtime and a 3000mAh battery capacity. Various charging sources are depicted below.
5. ऑपरेटिंग सूचना
६.१ पॉवर चालू/बंद आणि लाईट मोड
The flashlight features a single button for power control and mode selection.
- चालू/बंद करण्यासाठी: Press and hold the power button for approximately 1-2 seconds.
- मोड बदलण्यासाठी: Once the flashlight is on, short press the power button to cycle through the five available light modes: High, Medium, Low, Strobe, and SOS.
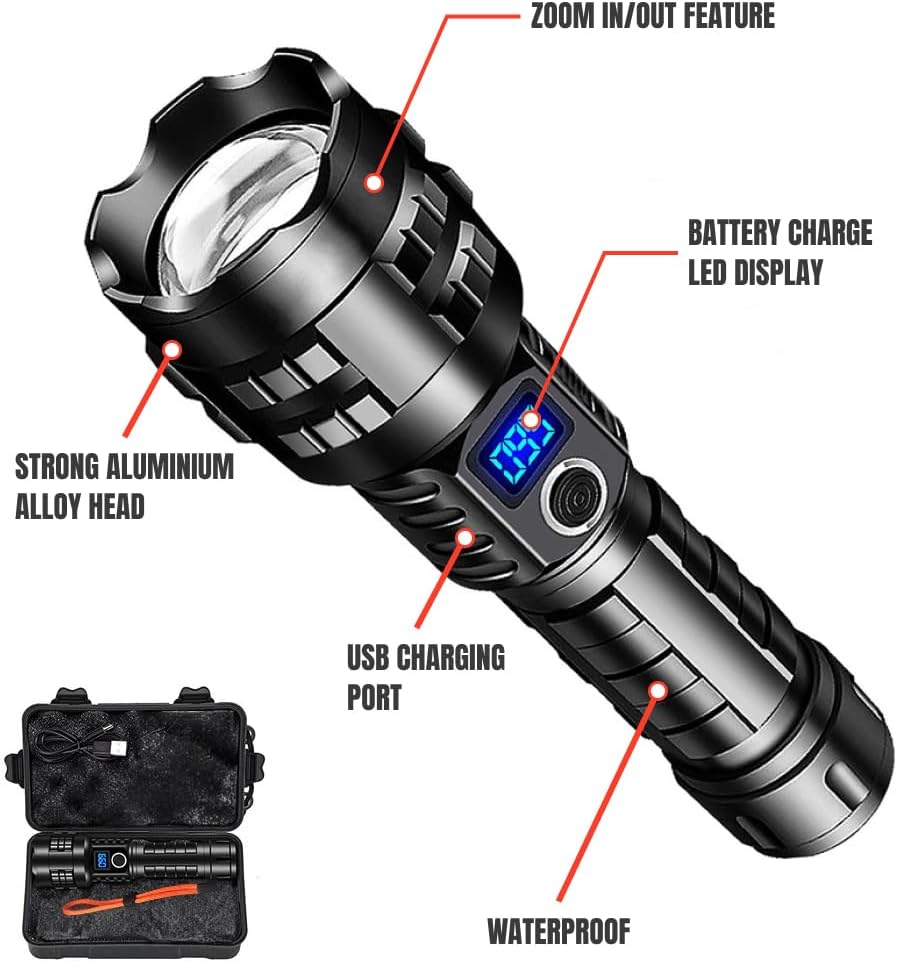
Image: An annotated diagram of the NightBuddy flashlight, pointing out its key features: zoom in/out, battery charge LED display, strong aluminum alloy head, USB charging port, and waterproof design.
5.2 Adjustable Focus (Zoom)
The flashlight head can be extended or retracted to adjust the beam from a wide floodlight to a focused spotlight.
- झूम इन करण्यासाठी (स्पॉटलाइट): Gently push the flashlight head forward to narrow the beam for long-distance illumination.
- झूम आउट करण्यासाठी (फ्लडलाइट): Gently pull the flashlight head backward to widen the beam for broad area illumination.
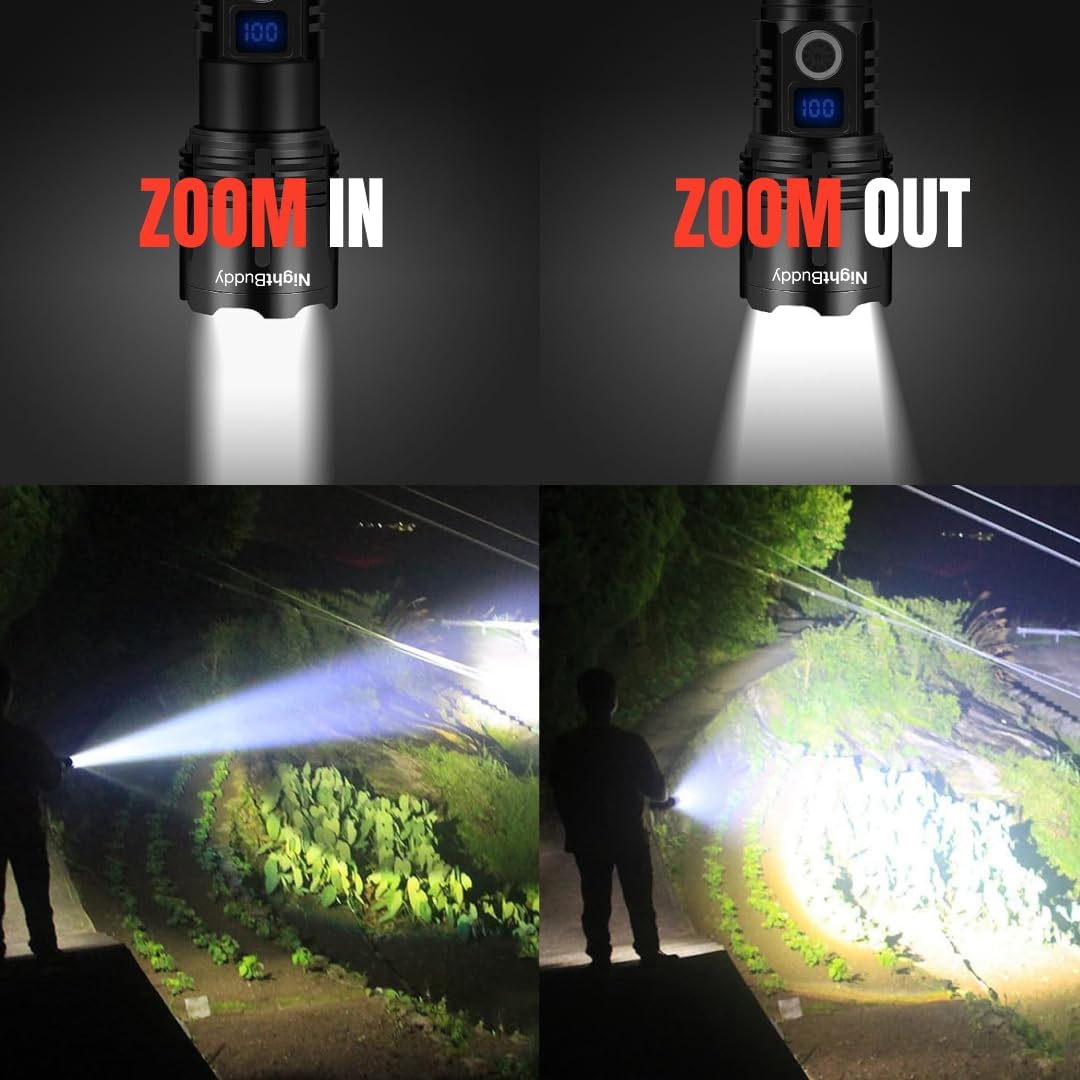
Image: A visual comparison demonstrating the NightBuddy flashlight's adjustable focus. The top shows the flashlight head in 'Zoom In' and 'Zoom Out' positions, while the bottom illustrates the resulting narrow spotlight and wide floodlight beams.
5.3 Power Bank Function (USB Output)
The NightBuddy flashlight can be used to charge other USB-powered devices.
- Ensure the flashlight has sufficient battery charge.
- Open the rubber cover of the USB output port (separate from the charging input port, if applicable).
- Connect your device's charging cable to the flashlight's USB output port.
- Charging will begin automatically. Monitor your device's charging status.
- Once charging is complete, disconnect the cable and securely close the rubber cover.

Image: The NightBuddy flashlight is shown connected via a USB cable to a smartphone, demonstrating its power bank functionality to charge other digital devices.
5.4 Emergency Window Breaker
The tail end of the flashlight is equipped with a hardened point designed for emergency window breaking.
- In an emergency, firmly strike the corner of a vehicle window with the window breaker tip to shatter the glass.
- Use with caution and only in emergency situations.

Image: The NightBuddy flashlight is depicted alongside a shattered car window, illustrating the use of its integrated emergency window breaker feature.
6. देखभाल
To ensure the longevity and optimal performance of your NightBuddy Tactical LED Flashlight, follow these maintenance guidelines:
- स्वच्छता: टॉर्च बॉडी सॉफ्टने पुसून टाका, damp कापड अपघर्षक क्लीनर किंवा सॉल्व्हेंट्स वापरू नका.
- जलरोधक सील: Regularly inspect the O-rings and seals for any damage or wear. Lubricate them periodically with silicone grease to maintain the IPX7 waterproof rating.
- बॅटरी काळजी: Store the flashlight with a partially charged battery if not used for extended periods. Avoid fully discharging the battery frequently to prolong its lifespan.
- स्टोरेज: Store the flashlight in a cool, dry place, away from direct sunlight and extreme temperatures. Use the provided protective case for safe storage and transport.
7. समस्या निवारण
If you encounter issues with your NightBuddy Tactical LED Flashlight, refer to the following common problems and solutions:
- टॉर्च चालू होत नाही:
- Ensure the battery is correctly installed with the positive (+) end facing the head.
- बॅटरी चार्ज झाली आहे का ते तपासा. आवश्यक असल्यास रिचार्ज करा.
- टेल कॅप पूर्णपणे घट्ट असल्याची खात्री करा.
- प्रकाश मंद किंवा लुकलुकणारा आहे:
- बॅटरी कमी असू शकते. बॅटरी रिचार्ज करा.
- Clean the battery contacts and flashlight contacts with a clean cloth.
- चार्जिंग काम करत नाही:
- Ensure the USB cable is securely connected to both the flashlight and the power source.
- भिन्न USB केबल किंवा पॉवर अडॅप्टर वापरून पहा.
- चार्जिंग पोर्ट स्वच्छ आणि भंगारमुक्त असल्याची खात्री करा.
या उपाययोजना करूनही समस्या कायम राहिल्यास, कृपया ग्राहक समर्थनाशी संपर्क साधा.
8. सुरक्षितता माहिती
कृपया खालील सुरक्षा खबरदारी पाळा:
- Do not shine the flashlight directly into eyes, as the intense light can cause temporary vision impairment or permanent damage.
- मुलांच्या आवाक्याबाहेर ठेवा.
- Do not disassemble or modify the flashlight, as this may void the warranty and pose a safety risk.
- Use only the specified type of rechargeable battery.
- Avoid exposing the flashlight to extreme temperatures or open flames.
- Ensure the rubber cover for the charging port is securely closed when not charging to maintain water resistance.
9. हमी आणि समर्थन
For warranty information or technical support, please refer to the contact details provided with your purchase or visit the official NightBuddy website. Please have your product model number (Model 1) and purchase date available when contacting support.