
1. परिचय
This manual provides detailed instructions for the installation, operation, and maintenance of your EVTSCAN Digital Thermoregulator. This device is designed to precisely control heating equipment, such as wall-mounted boilers and gas boilers, ensuring a stable and energy-efficient temperature environment. Please read this manual thoroughly before installation and use to ensure proper function and safety.
2. सुरक्षितता माहिती
डिव्हाइसचे नुकसान किंवा वैयक्तिक इजा टाळण्यासाठी नेहमी खालील सुरक्षा खबरदारी पाळा:
- स्थापना किंवा देखभाल करण्यापूर्वी वीज पुरवठा खंडित केला असल्याची खात्री करा.
- जर तुम्हाला इलेक्ट्रिकल वायरिंगबद्दल खात्री नसेल तर इन्स्टॉलेशन एखाद्या पात्र व्यावसायिकाने करावे.
- उपकरणाला पाणी किंवा जास्त आर्द्रतेच्या संपर्कात आणू नका.
- Use only the specified battery type (2 AA batteries) and ensure correct polarity.
- उपकरण ज्वलनशील पदार्थांपासून दूर ठेवा.
3. उत्पादन संपलेview
The EVTSCAN Digital Thermoregulator features a clear LCD display for easy monitoring and a simple interface for temperature control. Its compact design allows for discreet integration into your living space.

आकृती 3.1: समोर view of the Digital Thermoregulator. The LCD screen displays current settings and room temperature, with a rotary knob below for adjustments.
मुख्य घटक:
- एलसीडी डिस्प्ले: Shows set temperature, room temperature, time, and operational icons.
- Control Knob/Button: मेनू नेव्हिगेट करण्यासाठी आणि सेटिंग्ज समायोजित करण्यासाठी वापरले जाते.
- बॅटरी कंपार्टमेंट: Located on the rear or side for 2 AA batteries.
- वायरिंग टर्मिनल्स: For connection to the heating system.
4. तपशील
| वैशिष्ट्य | तपशील |
|---|---|
| मॉडेल | EVTSCANok0g9ct2zq |
| पॉवर मोड | 2 AA बॅटरी (समाविष्ट नाही) |
| Screen Accuracy | 0.5 ℃ |
| प्रोब सेन्सर | NTC (10k) 1% |
| संपर्क क्षमता | Greater than 30-230 V DC working voltage, lower current. Reference: 5 A 30 V (HF relay) or 2 A 30 V (NEC relay) |
| तापमान प्रदर्शन श्रेणी | 1 ते 40 ℃ |
| डीफॉल्ट तापमान समायोजन श्रेणी | 5 ते 35 ℃ |
| ऑपरेटिंग तापमान श्रेणी | 0 ते 50 ℃ |
| चालू कार्यक्रम | Set once a week |
| आउटपुट | रिले स्विच करत आहे |
| साहित्य | ज्वाला-प्रतिरोधक पॉली कार्बोनेट |
| वजन | 170 ग्रॅम |
5. सेटअप आणि स्थापना
The EVTSCAN Digital Thermoregulator is designed for simple installation. Follow these steps carefully:
5.1. अनपॅकिंग आणि तपासणी
पॅकेजिंगमधील सर्व घटक काळजीपूर्वक काढून टाका. पॅकेजमधील सर्व घटक उपस्थित आहेत आणि त्यांना नुकसान झालेले नाही याची खात्री करा.
- 1 Digital Temperature Controller
- 2 स्क्रू
5.2. बॅटरी इन्स्टॉलेशन
The device requires 2 AA batteries for operation. These are not included in the package.
- Locate the battery compartment on the back of the thermoregulator.
- बॅटरी कंपार्टमेंट कव्हर उघडा.
- योग्य ध्रुवता (+/-) सुनिश्चित करून 2 AA बॅटरी घाला.
- बॅटरी कंपार्टमेंट कव्हर सुरक्षितपणे बंद करा.

आकृती १: कोन असलेला view of the thermoregulator, illustrating its compact size and potential location for battery access or mounting points.
5.3. माउंटिंग आणि वायरिंग
The thermoregulator is designed for wall mounting. Ensure the power to your heating system is turned off before proceeding with wiring.
- Choose a suitable location on an interior wall, away from direct sunlight, drafts, or heat sources that could affect temperature readings.
- Mount the backplate (if detachable) to the wall using the provided screws.
- Connect the thermoregulator to your boiler or heating system according to the wiring diagram provided with your boiler and the thermoregulator's terminal markings. This typically involves connecting the switching relay output to the boiler's control input.
- Secure the thermoregulator onto the mounted backplate.
टीप: For wiring, consult a qualified electrician if you are unfamiliar with electrical installations.
6. ऑपरेटिंग सूचना
The EVTSCAN Digital Thermoregulator uses a microcomputer control technology to maintain your desired temperature efficiently.
6.1. Powering On and Initial Display
Once batteries are installed, the LCD display will illuminate, showing the current room temperature, set temperature, and time.
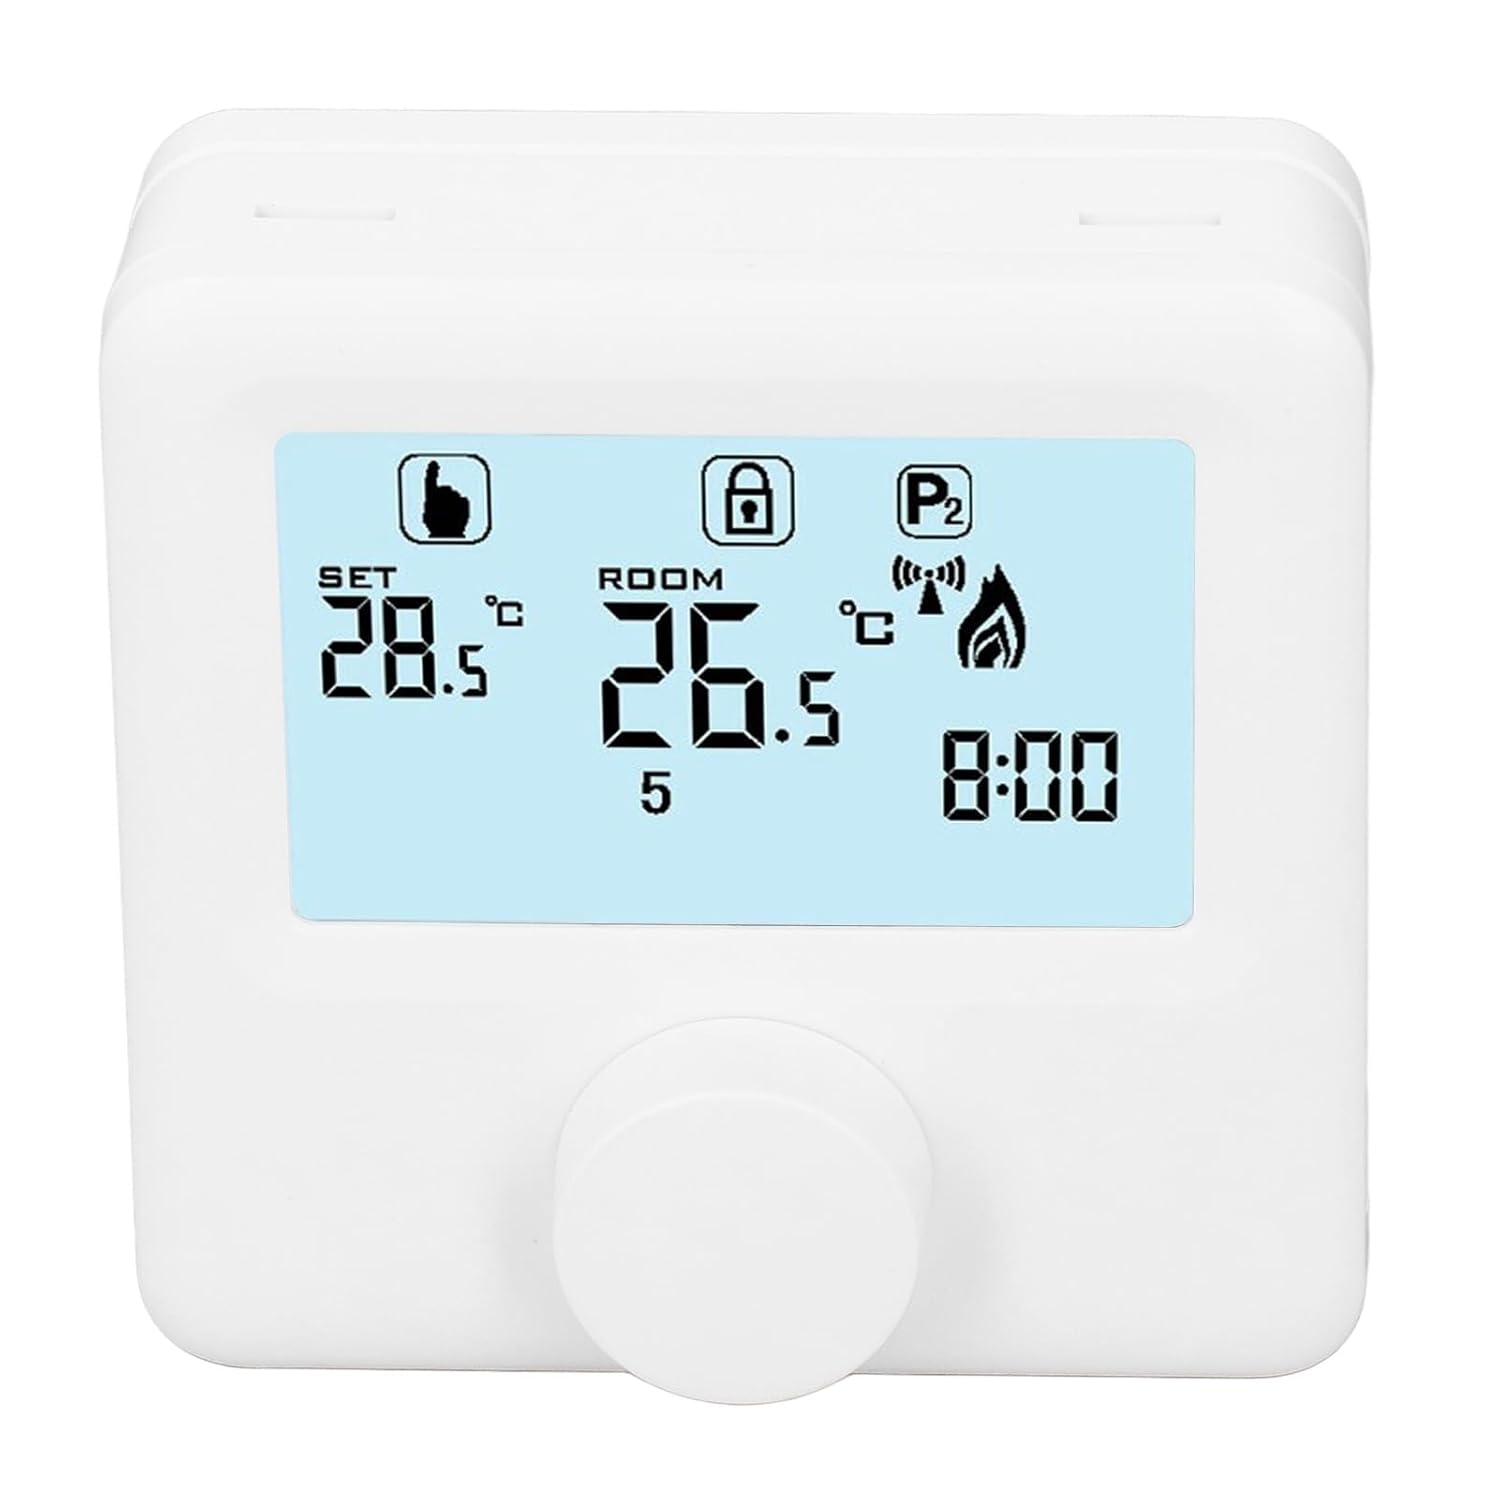
आकृती 6.1: तपशीलवार view of the LCD display. It shows the set temperature (SET), room temperature (ROOM), a lock icon, a program icon (P2), a signal icon, a flame icon indicating heating, and the current time.
१.३.४. तापमान सेट करत आहे
इच्छित तापमान समायोजित करण्यासाठी:
- Rotate the control knob to increase or decrease the set temperature. The "SET" value on the display will change accordingly.
- The device will automatically activate or deactivate the heating system to maintain the set temperature within the range of 1 to 40 ℃. The default adjustment range is 5 to 35 ℃.
५.३. प्रोग्रामिंग साप्ताहिक वेळापत्रक
The thermoregulator supports a weekly programming schedule. This allows you to set different temperatures for various times of the day across the week.
- Press and hold the control knob (or a designated button, if available) to enter programming mode.
- Use the control knob to navigate through days of the week and time slots.
- Adjust the desired temperature for each programmed period.
- Confirm your settings to save the weekly program. The device will then operate according to this schedule.
6.4. Understanding Display Icons
- सेट: Indicates the target temperature you have set.
- खोली: सध्याचे सभोवतालचे खोलीचे तापमान दाखवते.
- ज्वाला चिन्ह: हीटिंग सिस्टम सक्रिय असताना प्रकाशित होते.
- लॉक चिन्ह: May indicate a keypad lock feature to prevent accidental changes.
- P1/P2 Icon: Indicates the current program mode (e.g., P1 for comfort, P2 for economy, or specific weekly program segments).
- सिग्नल चिन्ह: May indicate wireless communication status if applicable.
7. देखभाल
Regular maintenance ensures the longevity and optimal performance of your thermoregulator.
- स्वच्छता: मऊ, कोरड्या कापडाने उपकरण पुसून टाका. अपघर्षक क्लीनर किंवा सॉल्व्हेंट्स वापरू नका.
- बॅटरी बदलणे: Replace batteries when the low battery indicator appears on the display. Always replace both batteries simultaneously with new AA batteries.
- सेन्सर क्षेत्र: Ensure the temperature sensor area (usually a small vent on the device) is free from dust and obstructions for accurate readings.
8. समस्या निवारण
If you encounter issues with your EVTSCAN Digital Thermoregulator, refer to the following common problems and solutions:
- प्रदर्शन रिक्त आहे:
- Check if batteries are correctly installed.
- जुन्या बॅटऱ्या नव्याने बदला.
- Heating system not responding:
- Ensure the thermoregulator is powered on and the flame icon is displayed when heating is expected.
- Verify wiring connections to the boiler are secure and correct.
- Check the boiler's power supply and status.
- Ensure the set temperature is higher than the current room temperature.
- तापमानाचे चुकीचे वाचन:
- Ensure the device is not exposed to direct sunlight, drafts, or heat sources.
- Clean any dust or debris from the sensor area.
- सेटिंग्ज बदलू शकत नाही:
- Check if the lock icon is displayed. If so, refer to the operating instructions to unlock the keypad.
समस्या कायम राहिल्यास, ग्राहक समर्थनाशी संपर्क साधा.
9. हमी आणि समर्थन
Specific warranty information for this product is not provided in the available data. Please refer to the product packaging or the retailer's webवॉरंटी तपशीलांसाठी साइट.
For technical support or further assistance, please contact EVTSCAN customer service through their official channels or the retailer from whom you purchased the product.
You can visit the EVTSCAN store on Amazon for more information: EVTSCAN Store