
1. उत्पादन संपलेview
The Teltonika RUT240 is an industrial 4G LTE Wi-Fi router designed for reliable cellular communication in various environments. This manual provides essential information for its proper installation, configuration, and use.
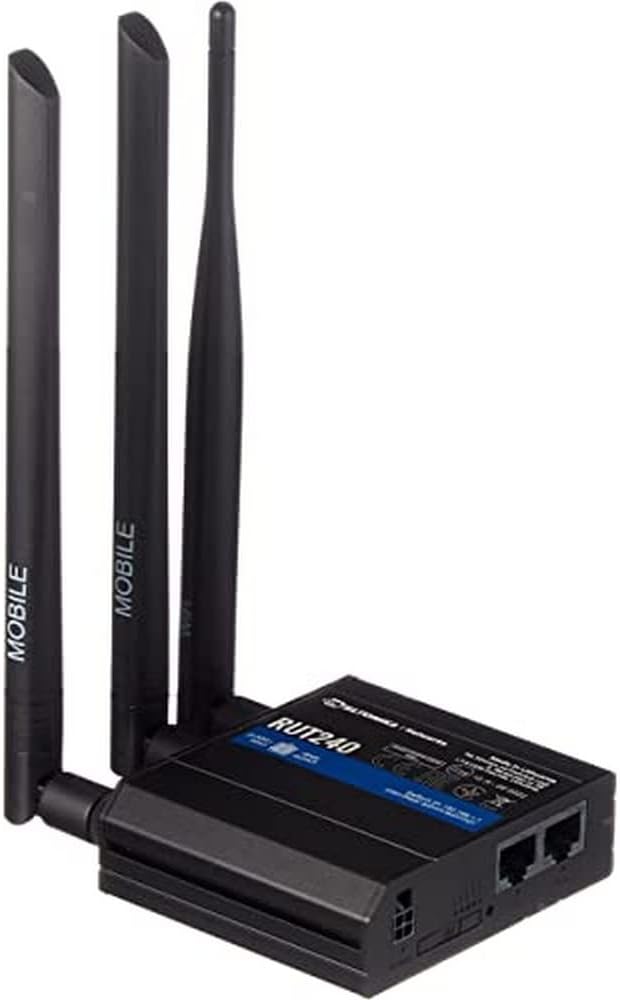
आकृती 1: समोर view of the Teltonika RUT240 LTE Router with its three attached antennas, illustrating its compact design.
2. पॅकेज सामग्री
स्थापनेसह पुढे जाण्यापूर्वी, सर्व आयटम पॅकेजमध्ये आहेत याची पडताळणी करा:
- Teltonika RUT240 LTE राउटर
- पॉवर अडॅप्टर
- इथरनेट केबल
- Two LTE Antennas (magnetic mount, SMA male)
- One Wi-Fi Antenna (magnetic mount, RP-SMA male)
- द्रुत प्रारंभ मार्गदर्शक

आकृती 2: The Teltonika RUT240 router displayed with its standard accessories, including the power adapter and an Ethernet cable.
3. सेटअप
3.1 हार्डवेअर स्थापना
- सिम कार्ड घाला: Locate the SIM card slot on the side of the router. Insert your activated Mini-SIM card into the slot until it clicks into place. Ensure the SIM card is correctly oriented as indicated on the device.
- अँटेना संलग्न करा: Screw the two LTE antennas onto the SMA connectors labeled "MOBILE" and the Wi-Fi antenna onto the RP-SMA connector labeled "WLAN" on the router. Ensure they are securely tightened.
- वीज कनेक्ट करा: Connect the power adapter to the power socket on the router and then plug the adapter into a power outlet. The router will begin to power on.
- Optional: Ethernet Connection: For initial configuration or wired network access, connect one end of the Ethernet cable to the LAN port on the router and the other end to your computer's Ethernet port.

आकृती 3: बाजू view of the Teltonika RUT240, highlighting the SIM card slot and the antenna connection points for mobile and Wi-Fi signals.

आकृती 4: मागील view of the Teltonika RUT240, showing the power input, SIM card slot, and the LAN/WAN Ethernet ports.
3.2 प्रारंभिक कॉन्फिगरेशन
- प्रवेश Web इंटरफेस: उघडा ए web browser on your connected computer and navigate to http://192.168.1.1.
- लॉगिन: Enter the default username "admin" and the password found on the device label or packaging. You will be prompted to change the password for security.
- Quick Setup Wizard: Follow the on-screen Quick Setup Wizard to configure basic settings such as mobile data connection (APN settings), Wi-Fi network name (SSID), and password.
4. ऑपरेटिंग सूचना
4.1 एलईडी निर्देशक
The RUT240 features several LED indicators to provide status information:
- पॉवर एलईडी: Indicates power status. Solid green when powered on.
- Mobile Signal Strength LEDs: Multiple LEDs indicate the strength of the cellular signal. More illuminated LEDs mean stronger signal.
- Network Type LEDs: Indicate the active cellular network type (e.g., 2G, 3G, 4G/LTE).
- वाय-फाय एलईडी: Indicates Wi-Fi module status.
- लॅन/वॅन एलईडी: Indicate activity on the respective Ethernet ports.
4.2 Wi-Fi शी कनेक्ट करत आहे
- तुमच्या डिव्हाइसवर (स्मार्टफोन, लॅपटॉप), उपलब्ध वाय-फाय नेटवर्क शोधा.
- Select the network name (SSID) configured during the initial setup.
- विचारल्यावर वाय-फाय पासवर्ड (WPA2 की) एंटर करा.
- Once connected, your device should have internet access via the RUT240.
4.3 प्रगत कॉन्फिगरेशन
राउटरचे web interface (RutOS) offers extensive configuration options for advanced users, including VPN, firewall rules, SMS utilities, and more. Refer to the official Teltonika documentation for detailed guides on advanced features.
5. देखभाल
- फर्मवेअर अद्यतने: Regularly check for and install firmware updates from the official Teltonika website to ensure optimal performance, security, and access to new features. This can typically be done via the router's web इंटरफेस
- स्वच्छता: Keep the router clean and free from dust. Use a soft, dry cloth. Do not use liquid cleaners.
- पर्यावरणीय परिस्थिती: Ensure the router is operated within its specified temperature and humidity ranges to prevent damage. Avoid direct sunlight and excessive heat.
- सुरक्षित पासवर्ड: Periodically change your router's login password and Wi-Fi password to maintain network security.
6. समस्या निवारण
| समस्या | संभाव्य कारण | उपाय |
|---|---|---|
| इंटरनेट प्रवेश नाही |
|
|
| प्रवेश करू शकत नाही Web इंटरफेस |
|
|
| Wi-Fi Not Visible or Connectable |
|
|
6.1 फॅक्टरी रीसेट
If you encounter persistent issues, a factory reset may resolve them. To perform a factory reset:
- राउटर चालू असल्याची खात्री करा.
- Locate the reset button (often recessed) on the router.
- Use a thin object (e.g., a paperclip) to press and hold the reset button for approximately 10 seconds.
- Release the button when the LEDs indicate a reset (e.g., all LEDs flash). The router will reboot with factory default settings.
7. तपशील
| वैशिष्ट्य | तपशील |
|---|---|
| मॉडेलचे नाव | टेलटोनिका RUT240 |
| आयटम मॉडेल क्रमांक | RUT24006B000 |
| उत्पादन परिमाणे | 2.91 x 3.27 x 0.98 इंच |
| आयटम वजन | 4 मिलीग्राम |
| ऑपरेटिंग सिस्टम | RutOS |
| कनेक्टिव्हिटी तंत्रज्ञान | लॅन, वाय-फाय |
| वायरलेस कम्युनिकेशन स्टँडर्ड | 802.11n |
| वारंवारता बँड वर्ग | क्वाड-बँड |
| विशेष वैशिष्ट्य | WPS |
| सुसंगत साधने | वैयक्तिक संगणक |
| शिफारस केलेले वापर | देखरेख |
| उत्पादक | JSC Teltonika |
8. हमी आणि समर्थन
For detailed warranty information, please refer to the official Teltonika website or the warranty card included with your product. Technical support is available through Teltonika's official support channels, including their website and dedicated support portal.
ऑनलाइन संसाधने:
- Teltonika RUT240 Wiki (for comprehensive documentation and guides)
- Teltonika Networks Support